
Abutment teeth preparations on enamel
The dentist can accurately prepare abutment teeth when equipped with diagnostic casts that have a preliminary removable partial denture design drawn on them. The tentative treatment plan on the diagnostic cast should include the proposed path of placement, the areas of teeth to be altered and tooth contours to be changed, and the locations of rest seats and guiding planes.
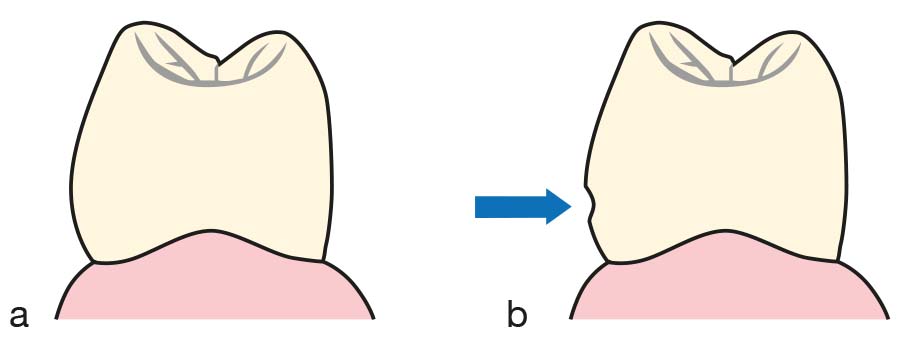
Since preservation is essential when changing the shape of the enamel surfaces, the abutment teeth arrangement should remain within the enamel boundaries. In cases where an excessive amount of correction is required or when there is not enough enamel thickness, restoration of the tooth with a crown is more appropriate. After the modification, the enamel surface is smoothed with green stone, polished with rubber and fluoridated.
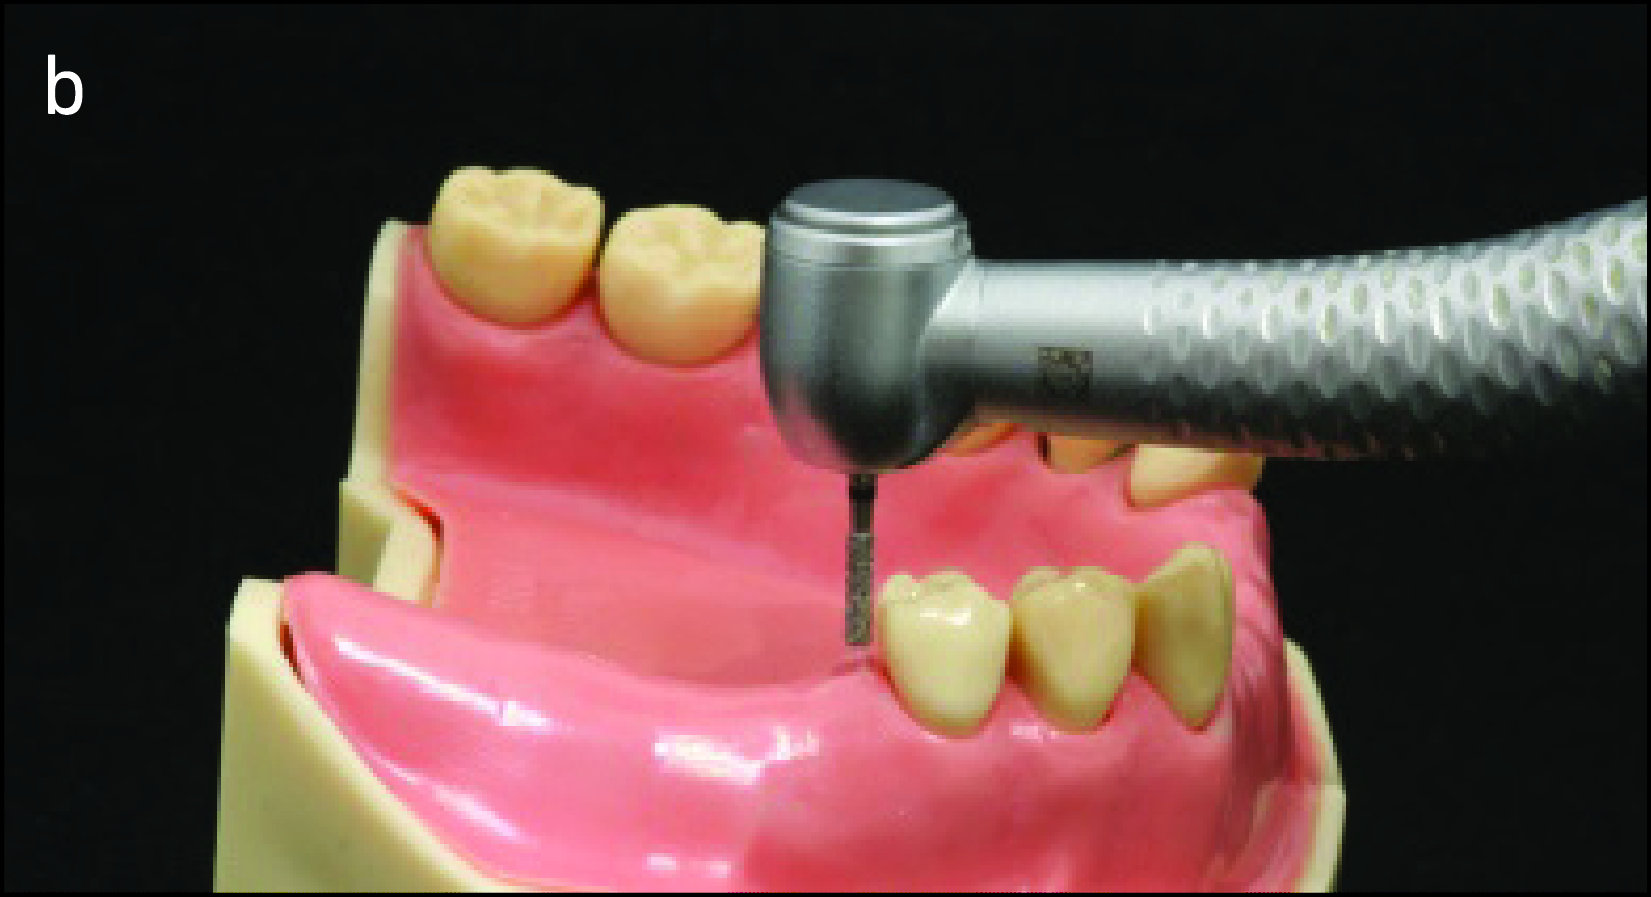
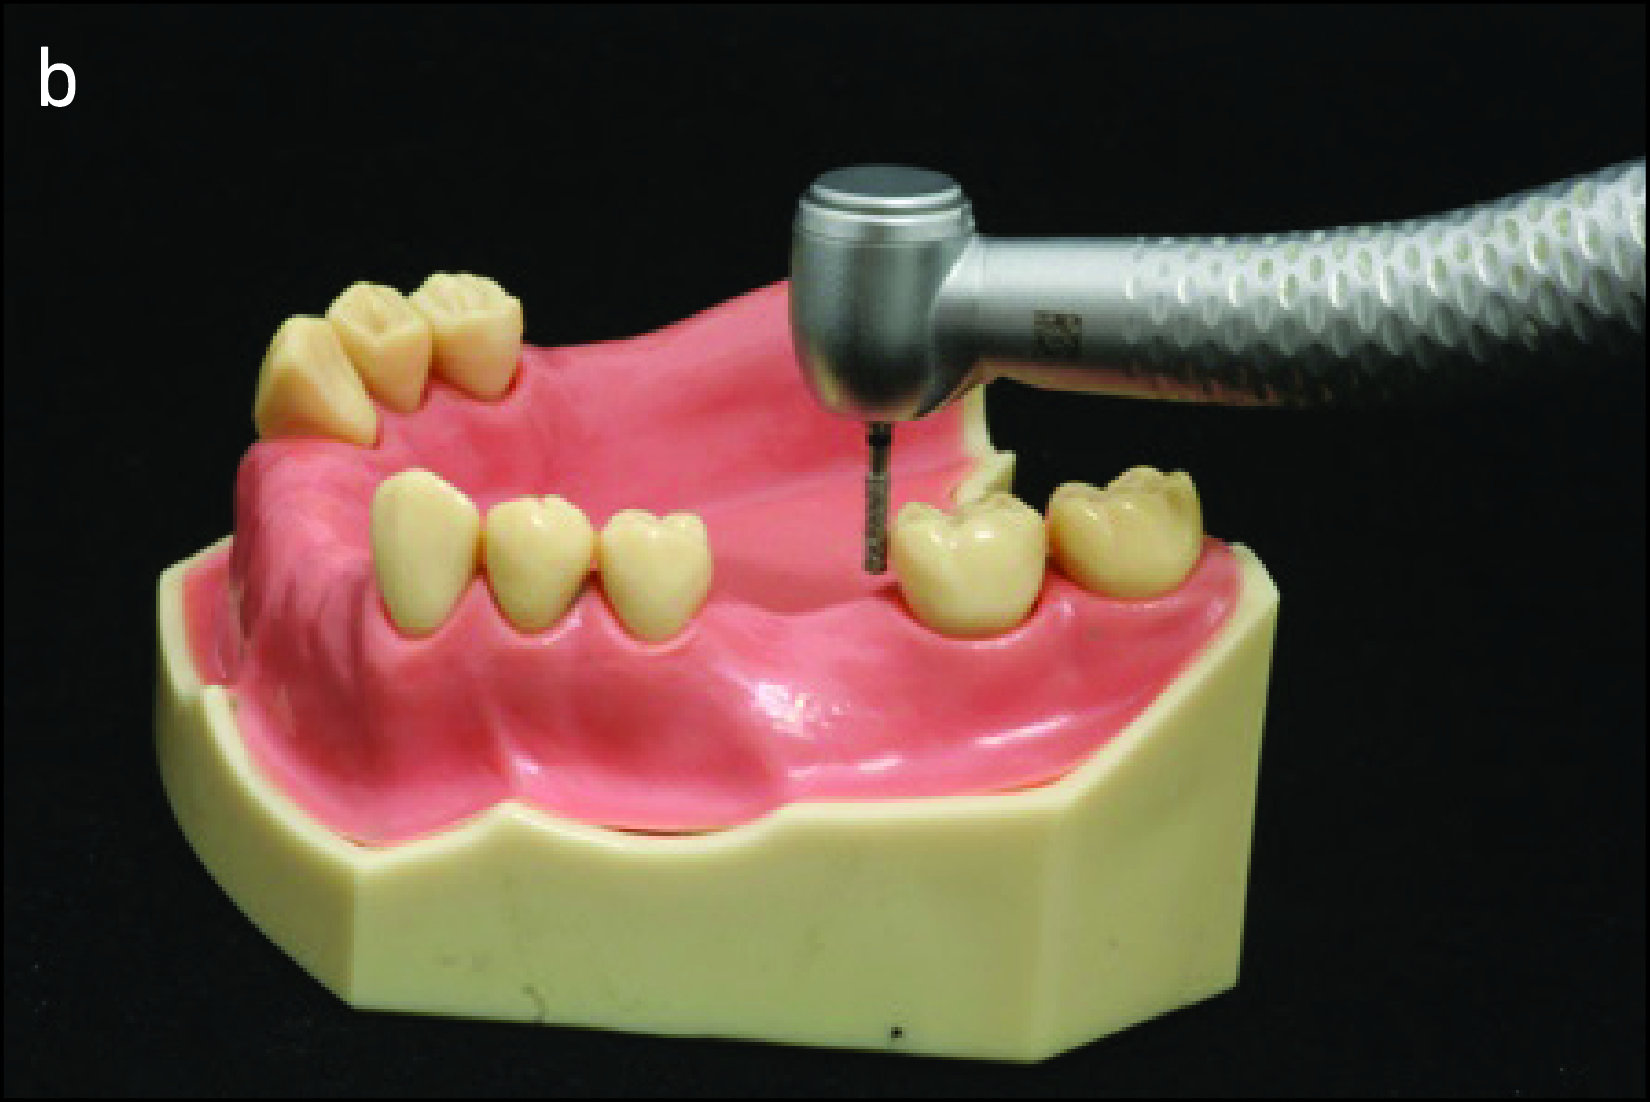
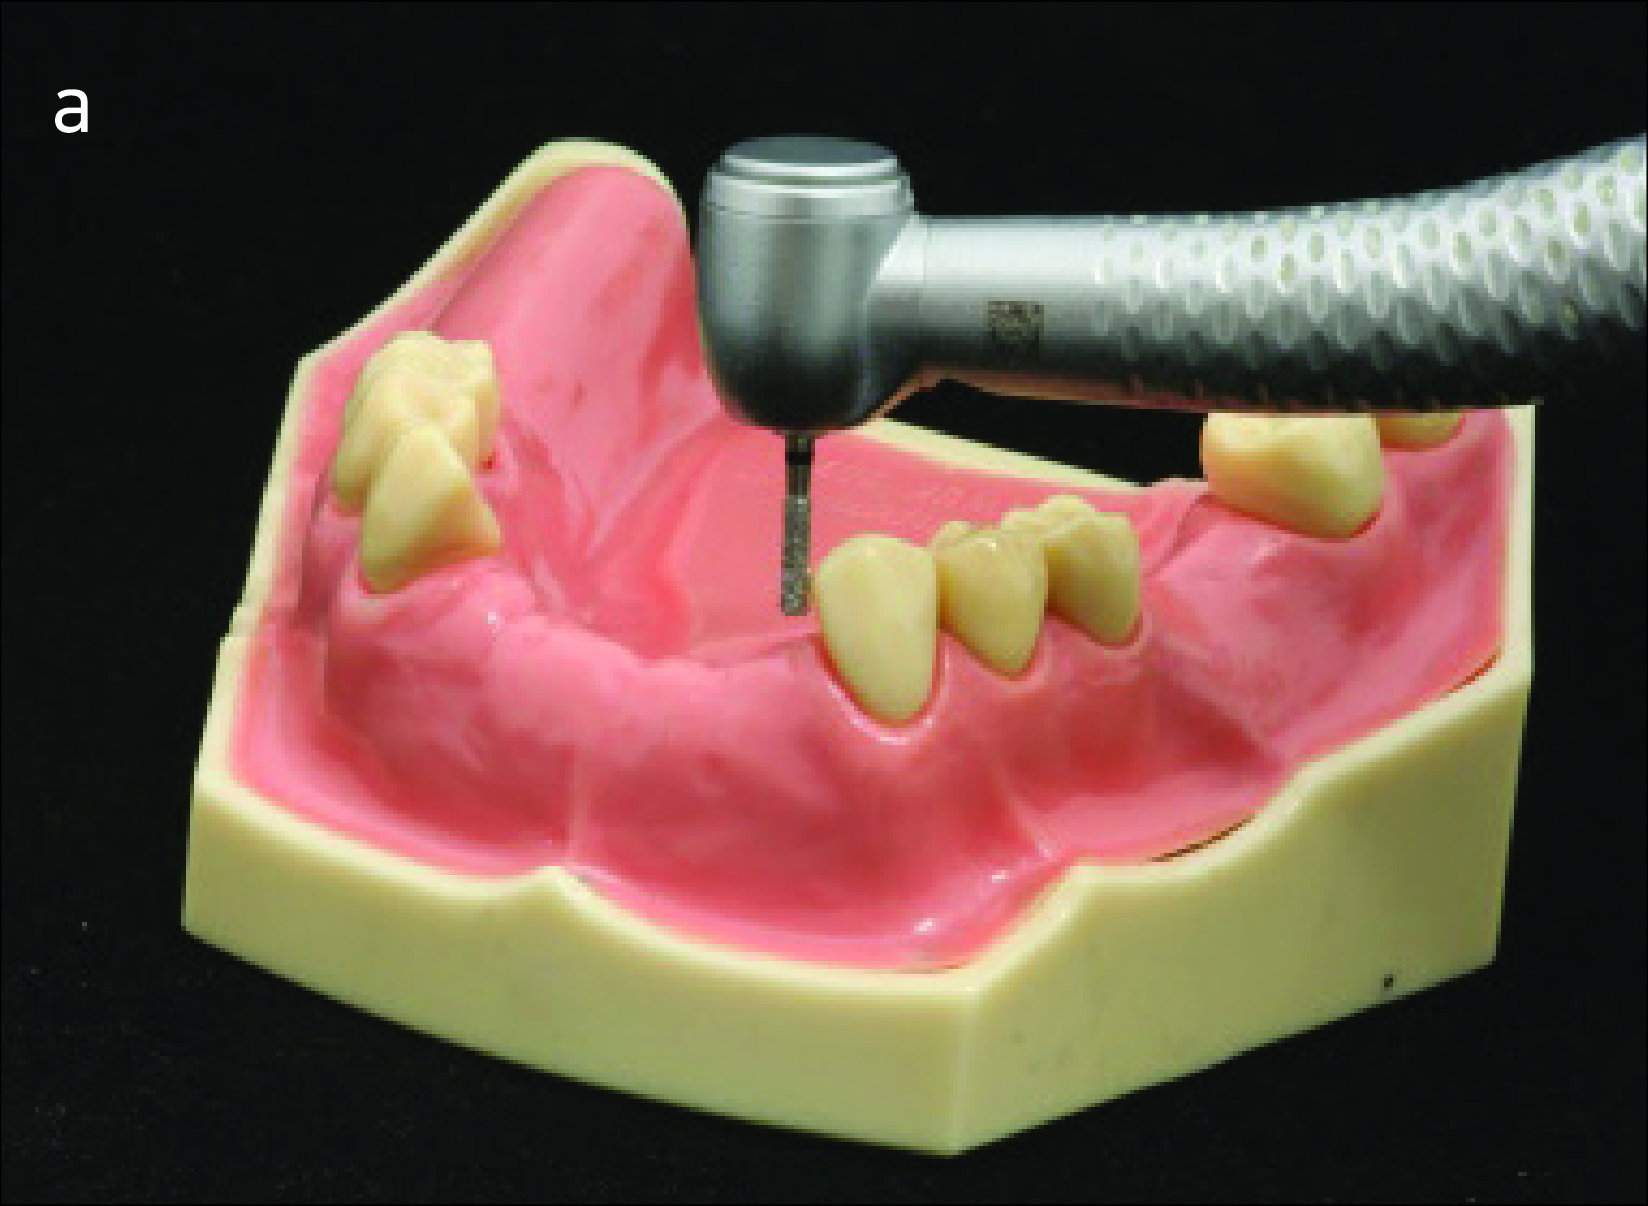
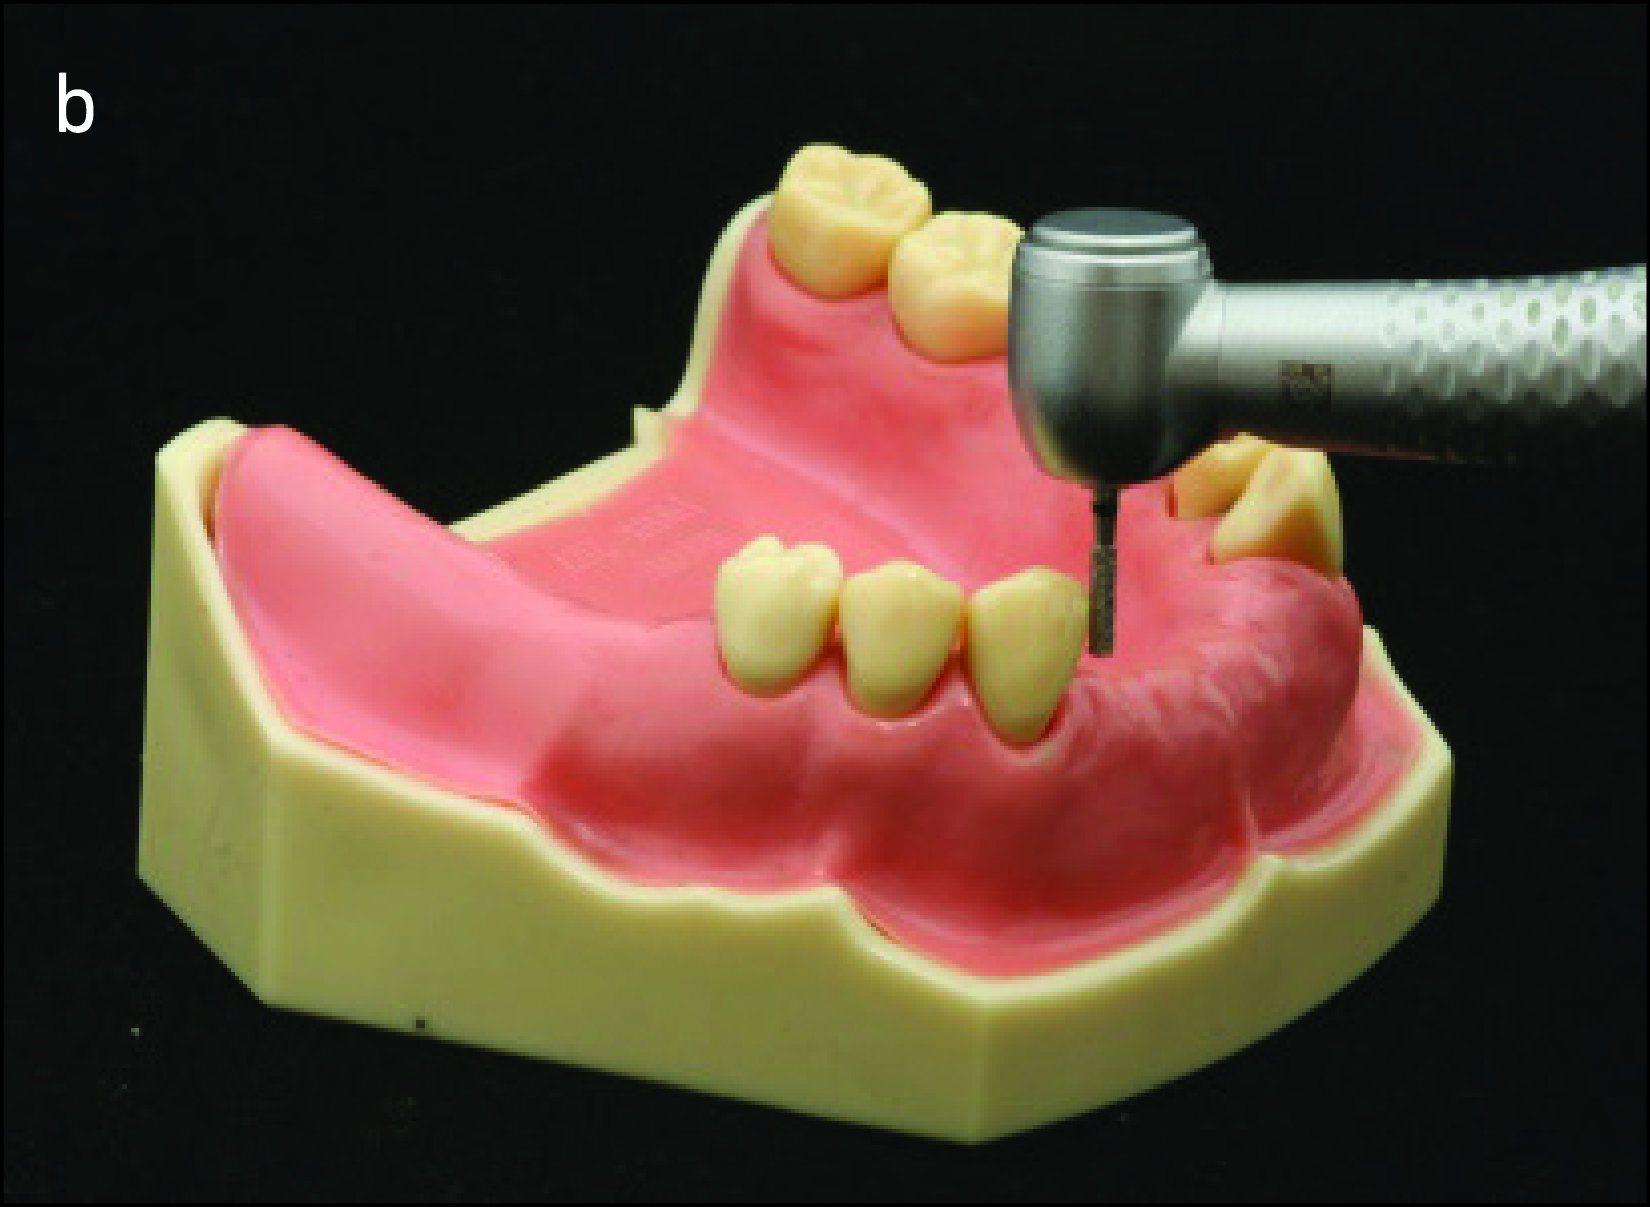
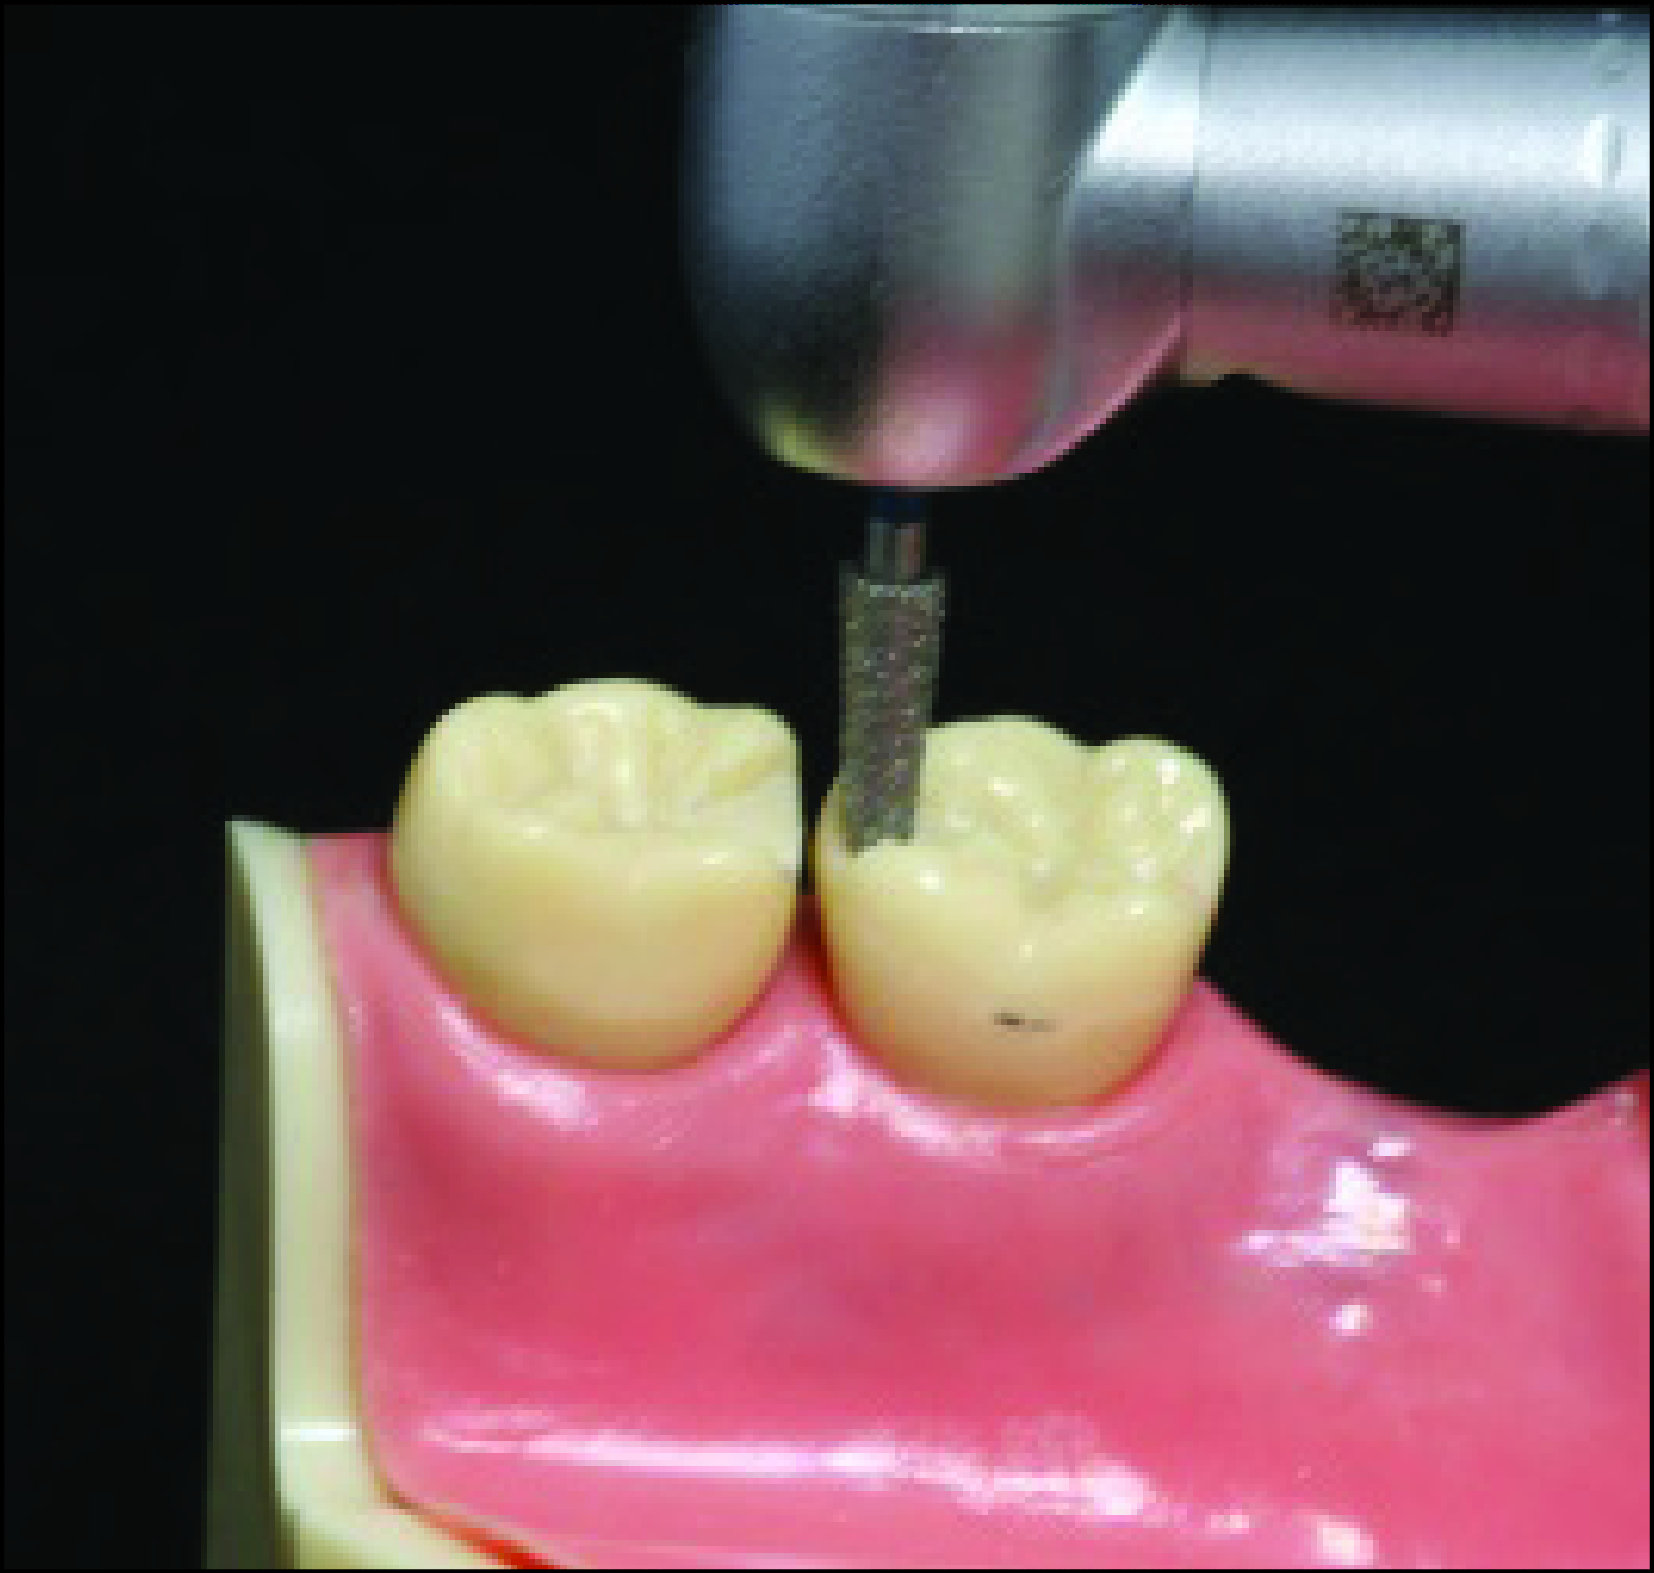
Throughout the mouth preparation process, the diagnostic model should be with the dentist on the analyzer table, positioned at the appropriate inclination to the path of insertion. Thus, the relationship between the diamond bur and the tooth surface to be shaped is projected from the model into the mouth (Figure 10-18).
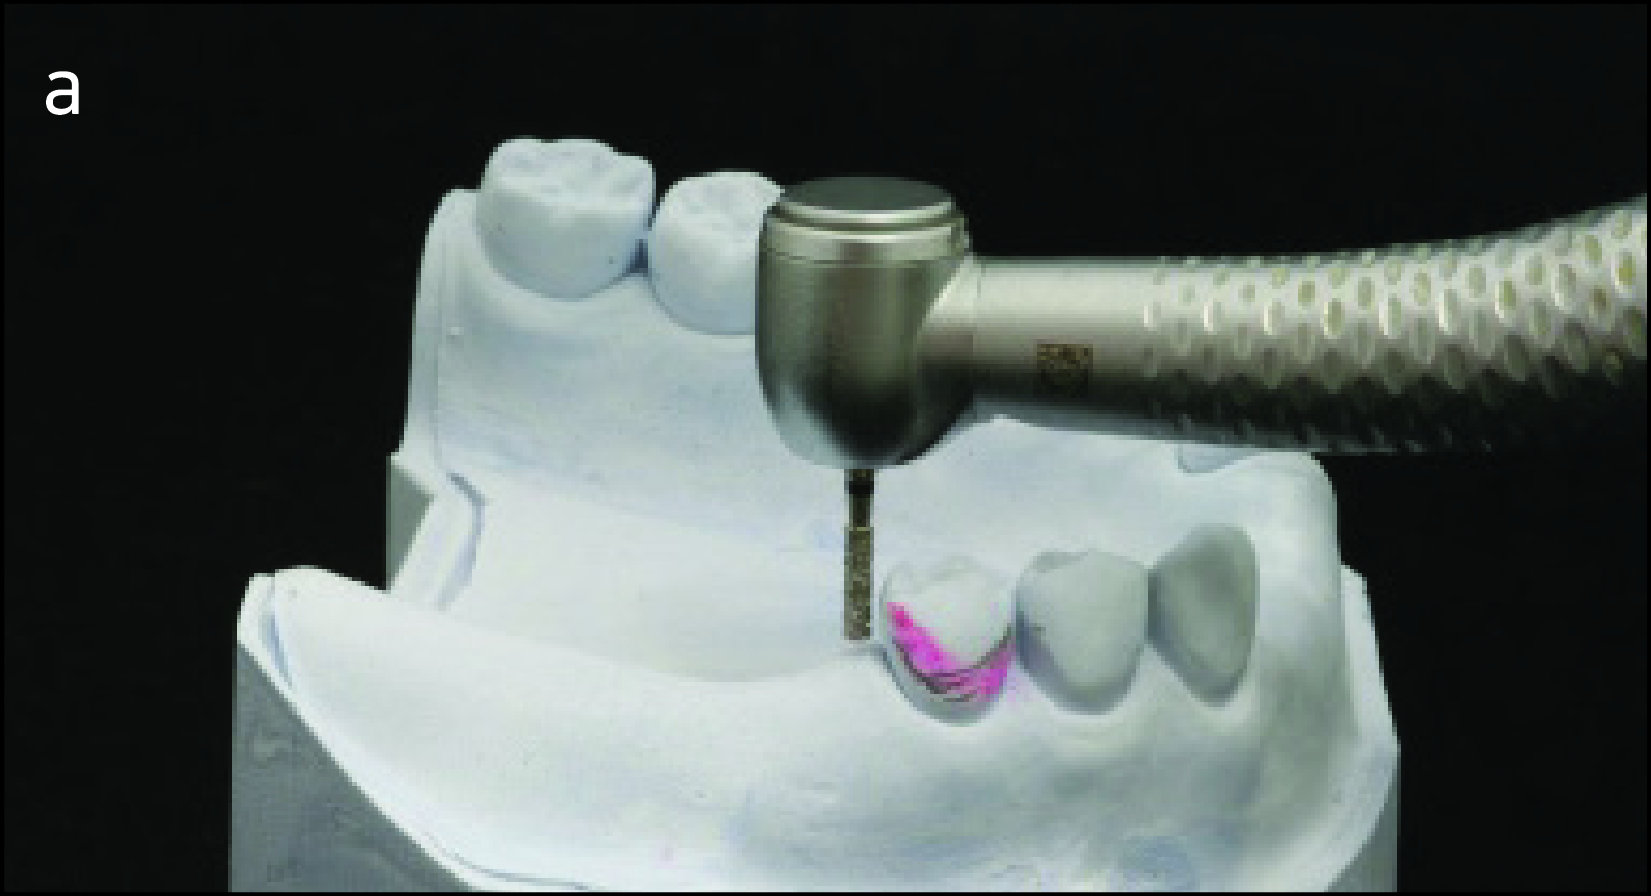  |
a) The relationship between the tooth surface shaped in the diagnostic model on the analyzer table and the bur.
b) Preparation made by projecting the relationship between the bur and the model into the patient's mouth.
Preparation of guide planes
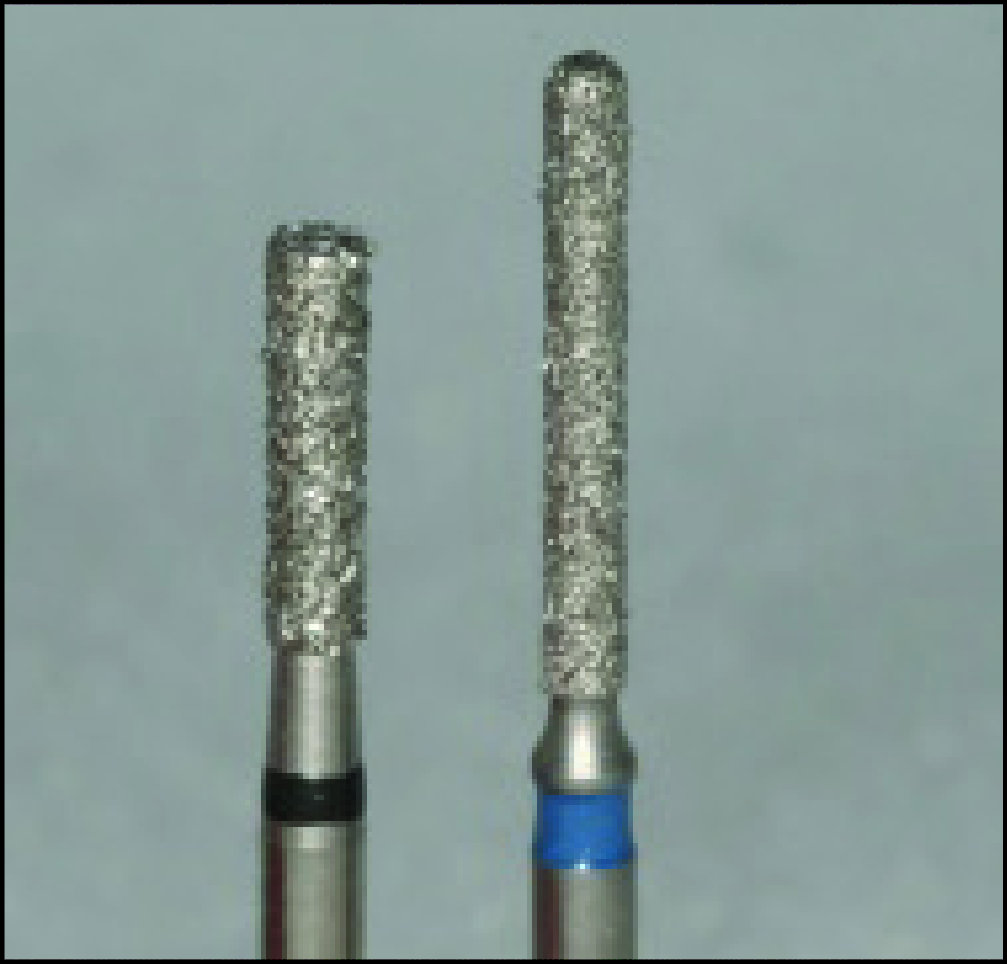
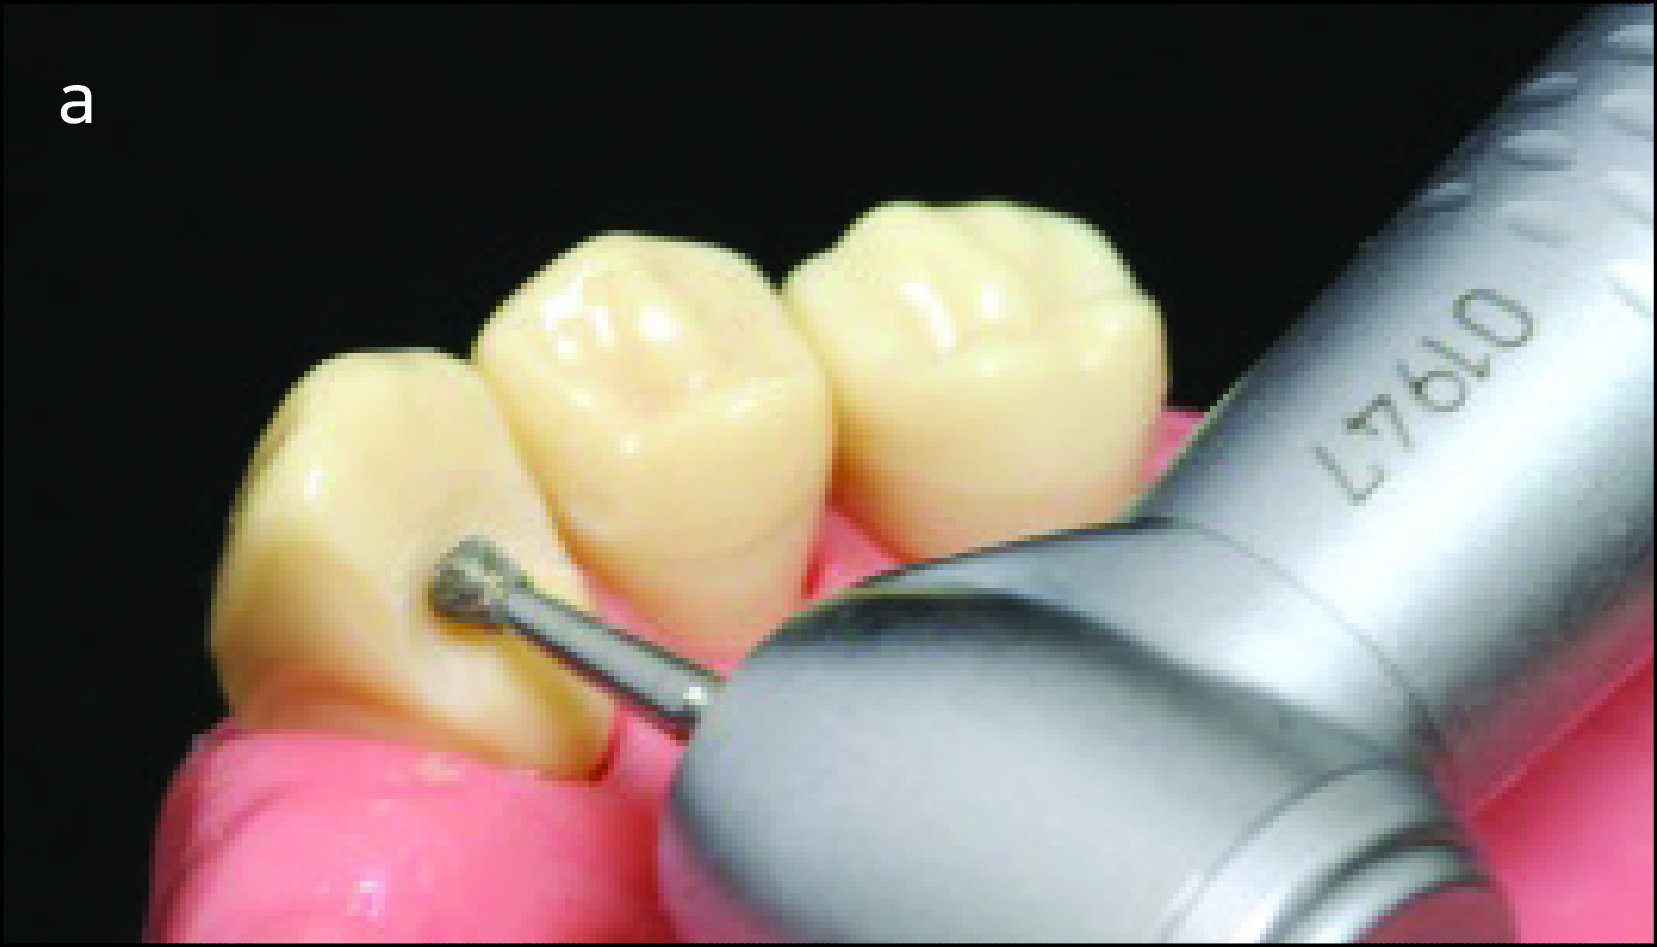
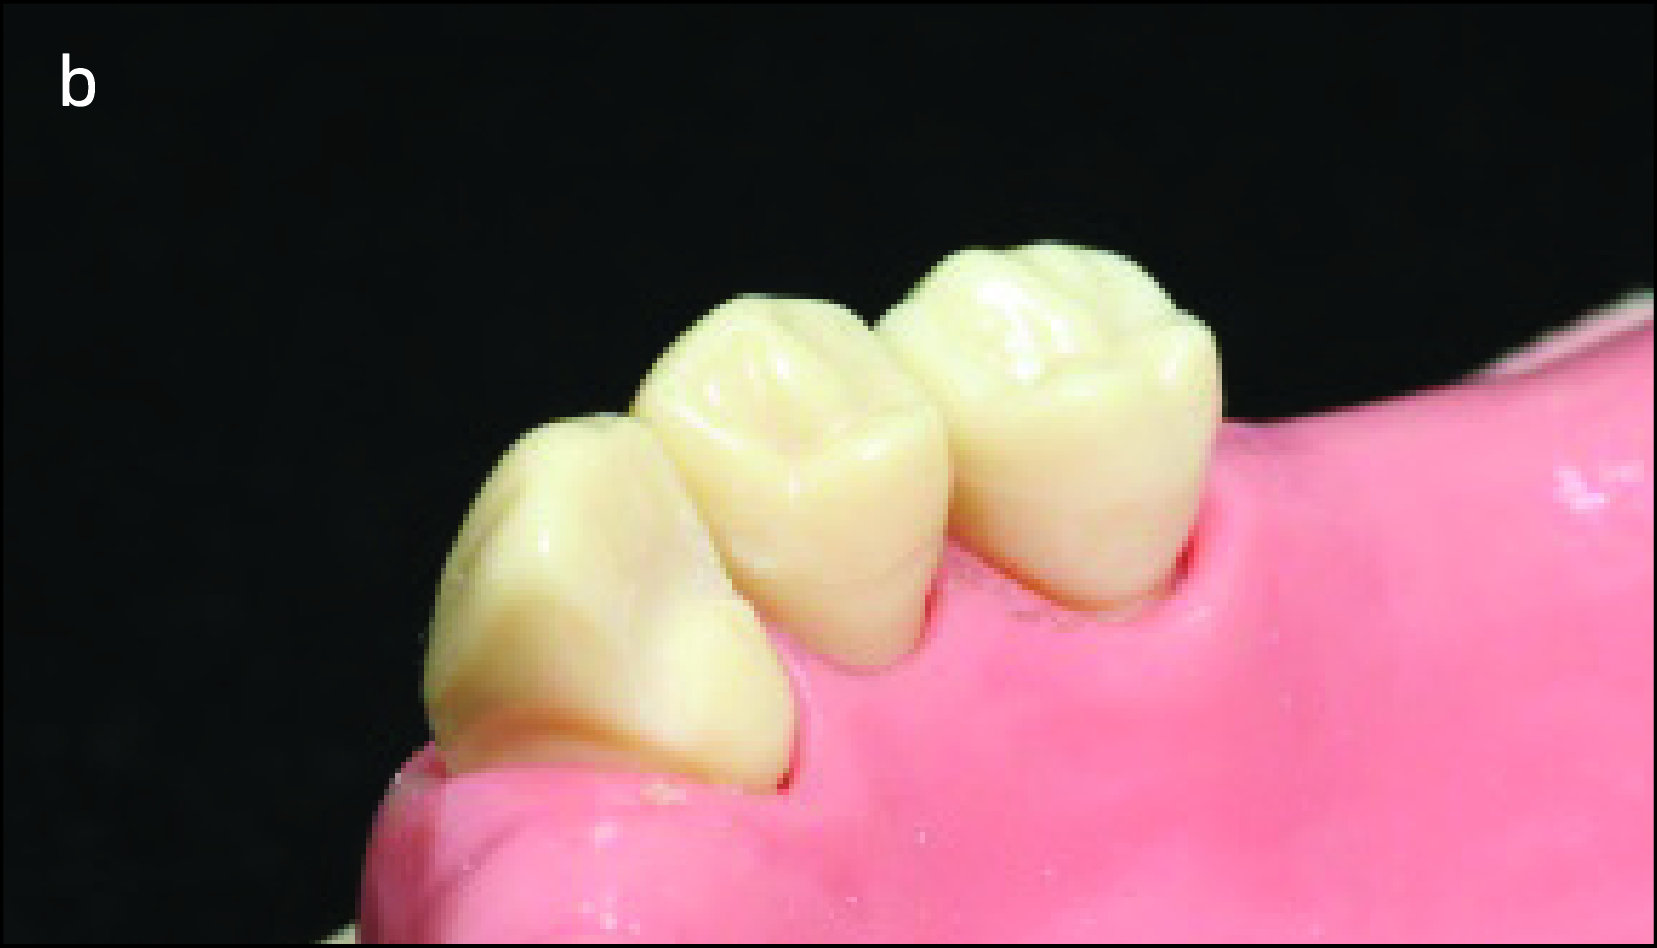
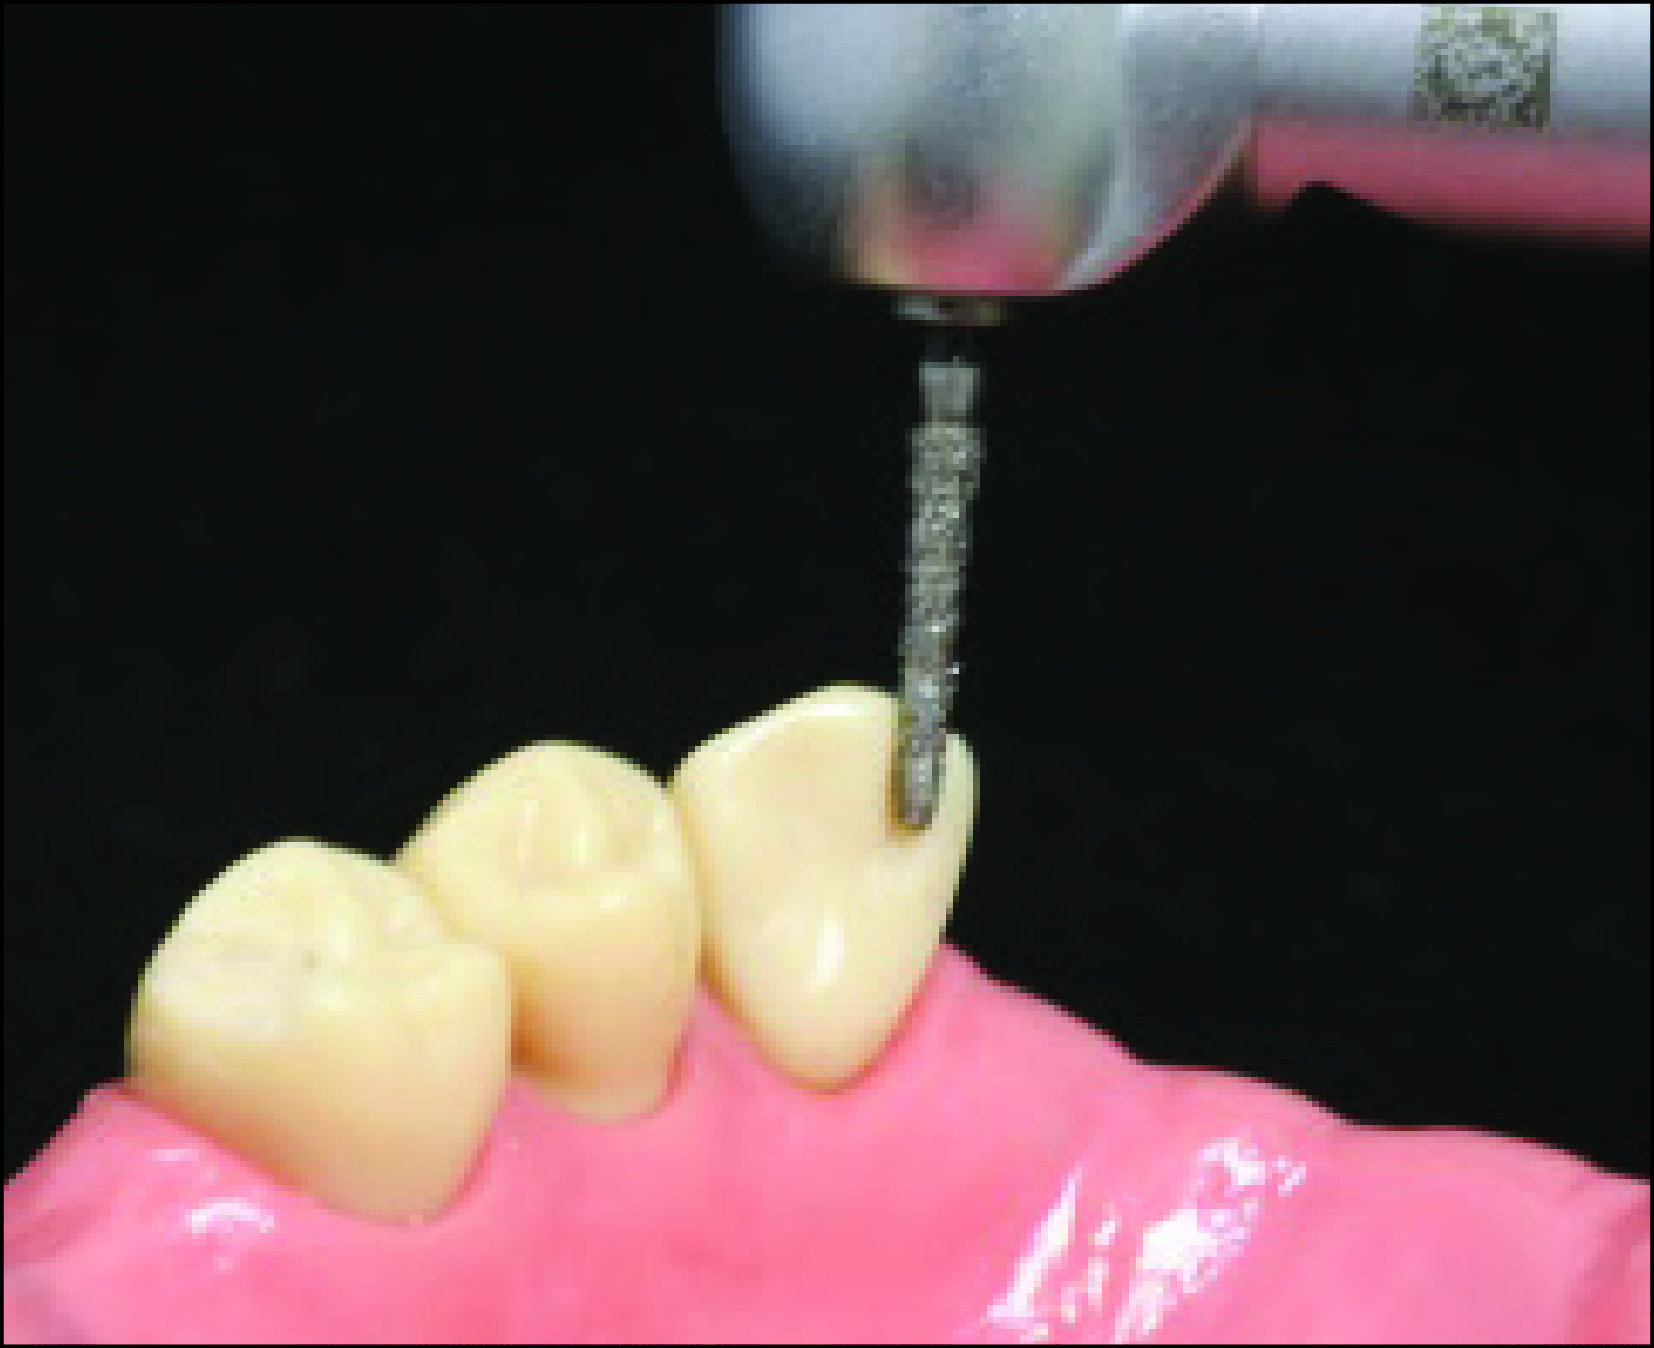
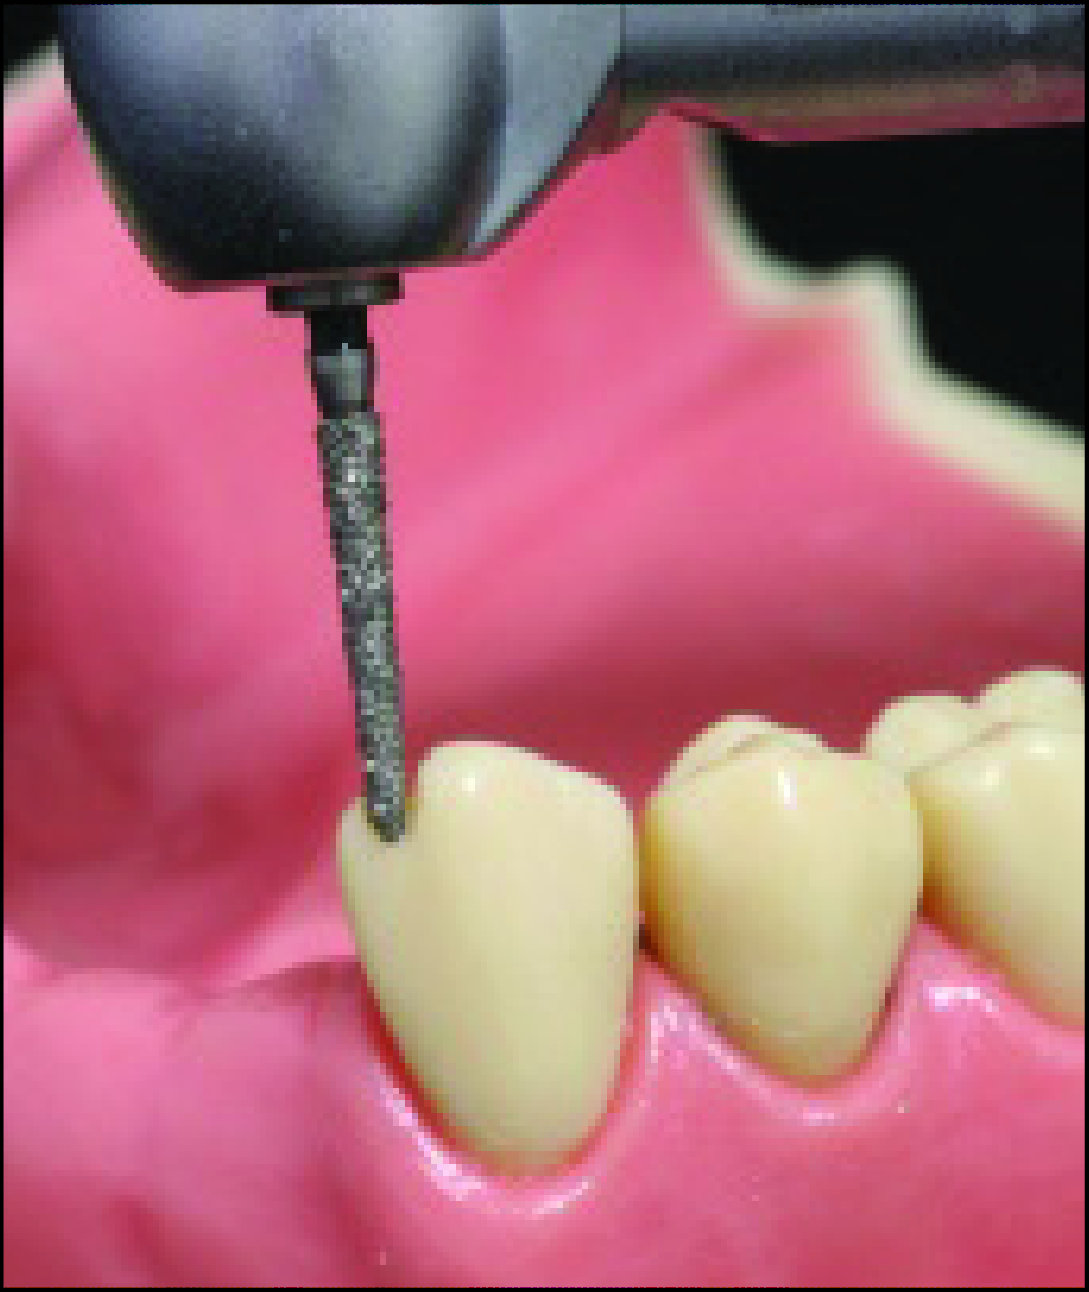
The lingual and proximal surfaces of the teeth are prepped to serve as the guide planes, which have to be parallel to one another and to the prosthesis’s path of insertion. The position of the abutment teeth determines how the guide plane is prepared, and a cylindrical diamond or carbide bur is typically utilized (Fig. 10-19).
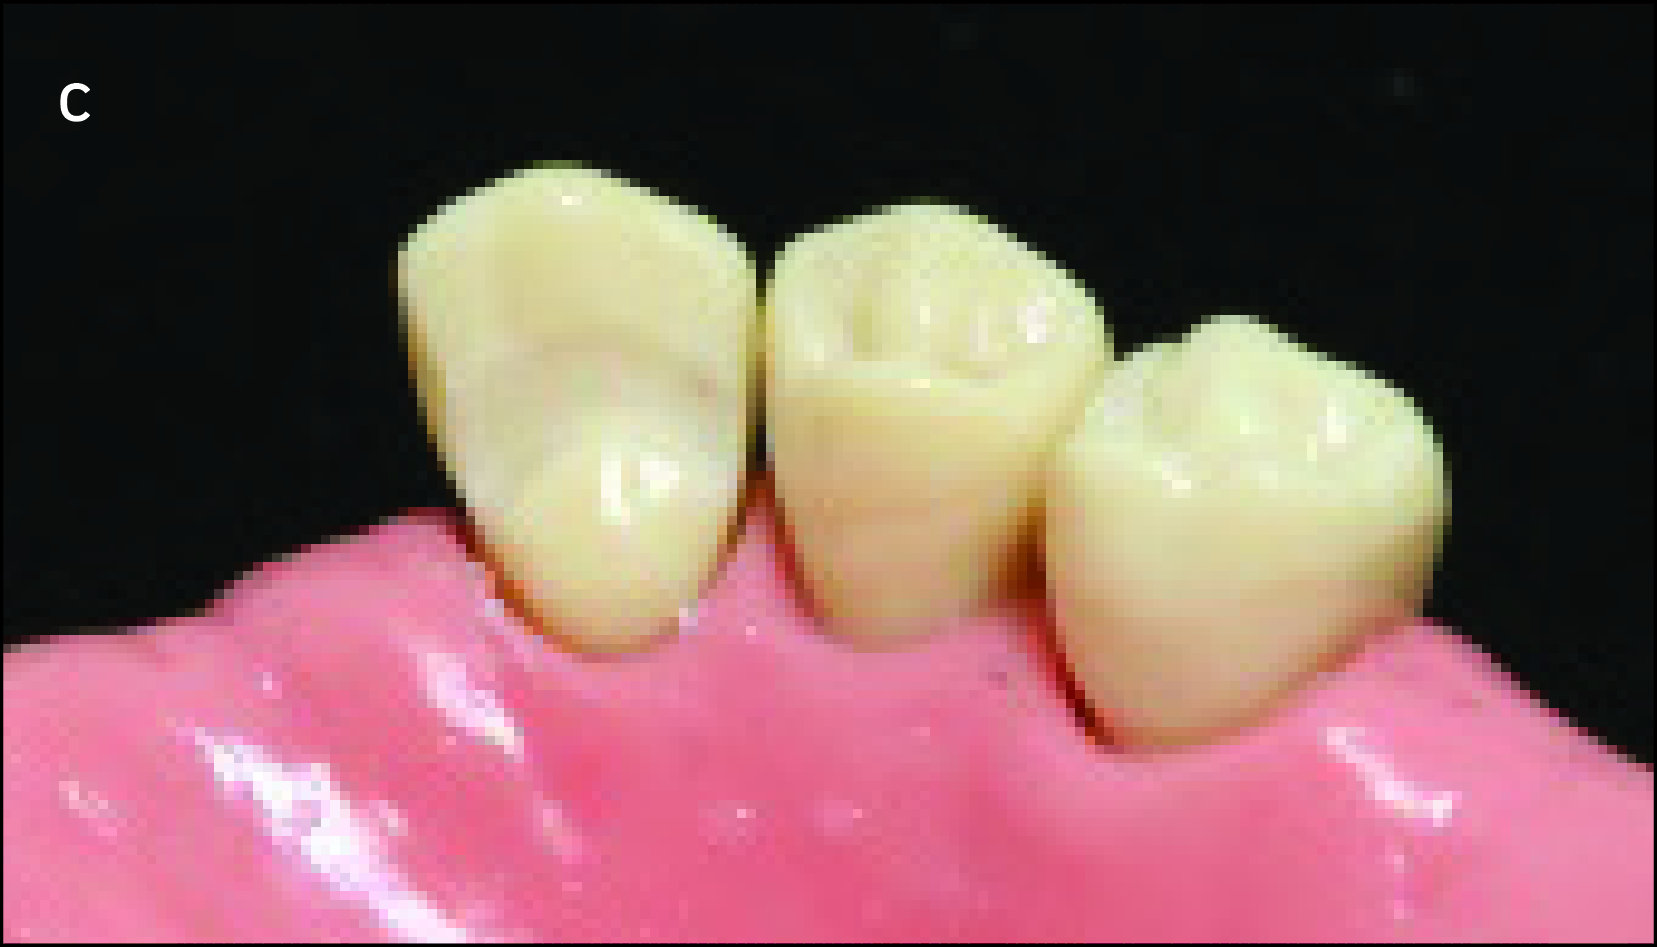
On the abutment teeth adjacent to the tooth-supported denture base, a slightly curved guide plane is shaped by directing the bur from the buccal corner to the lingual corner of the aproximal surface (Figures 10-20).
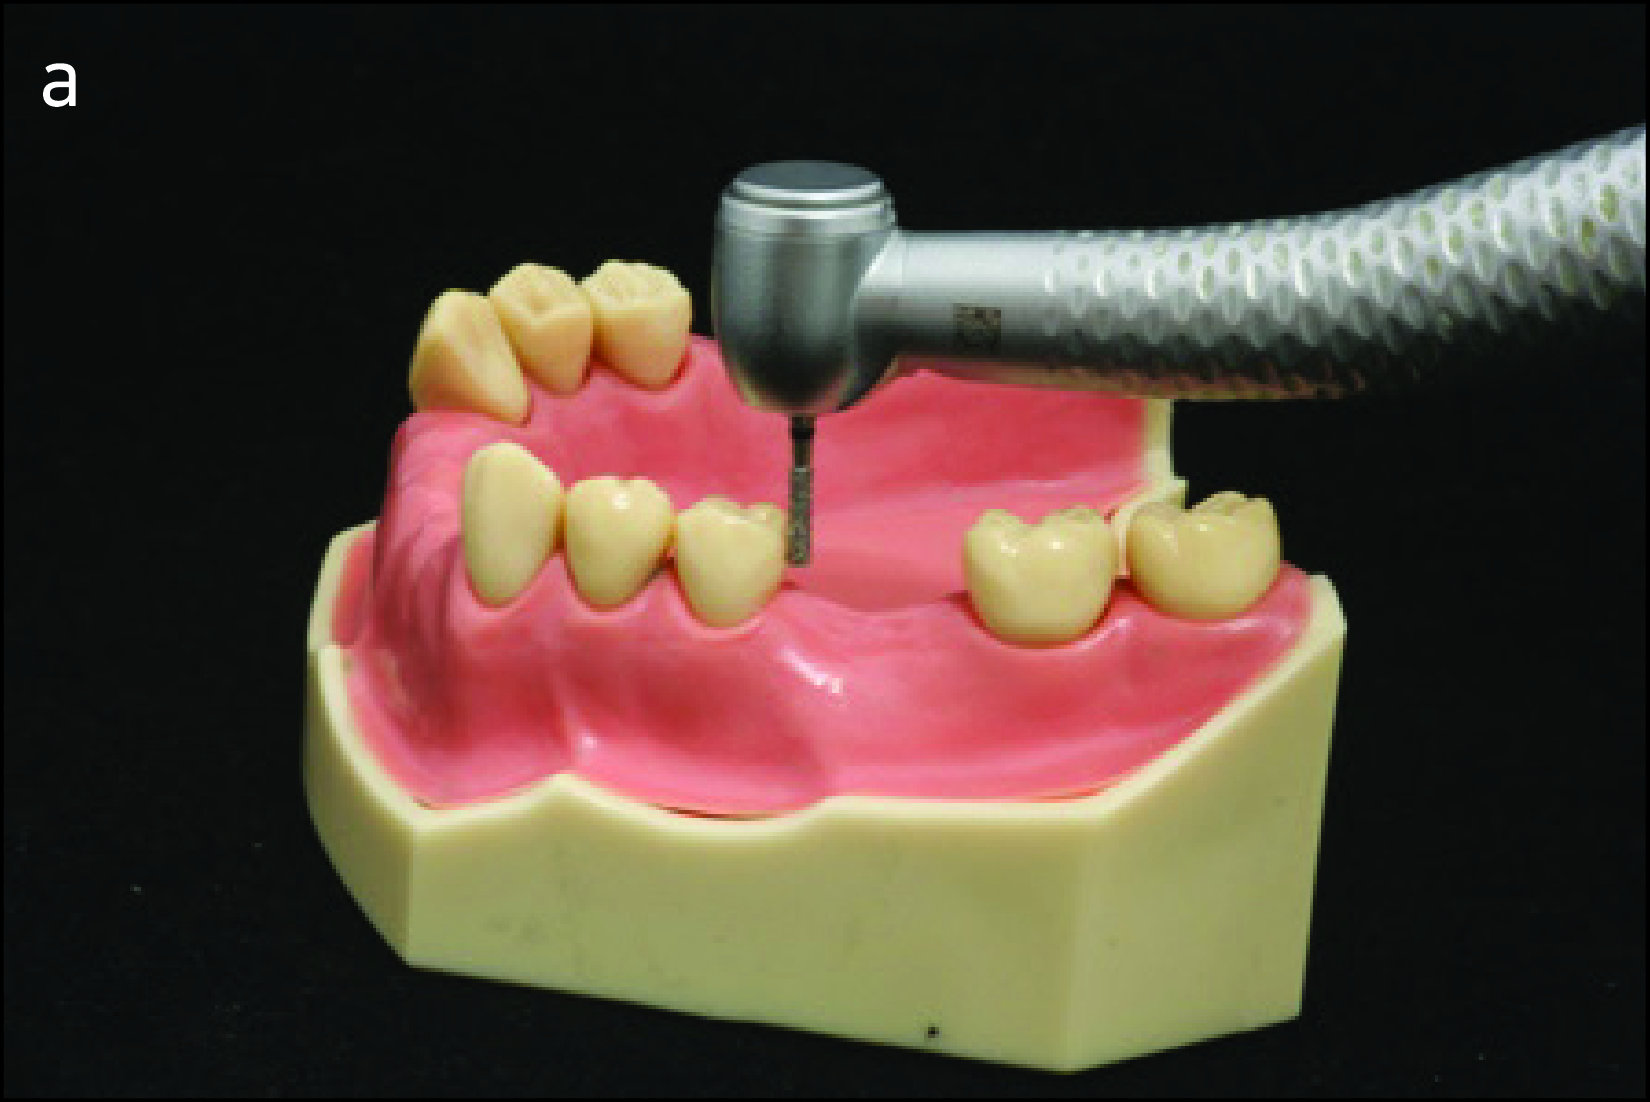  |
(a) anterior
(b) posterior guide planes in the abutment tooth must be parallel to each other and to the path of insertion.
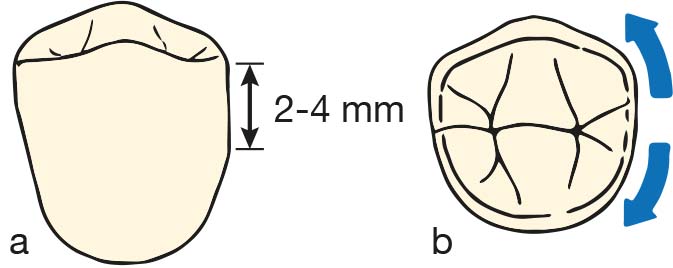
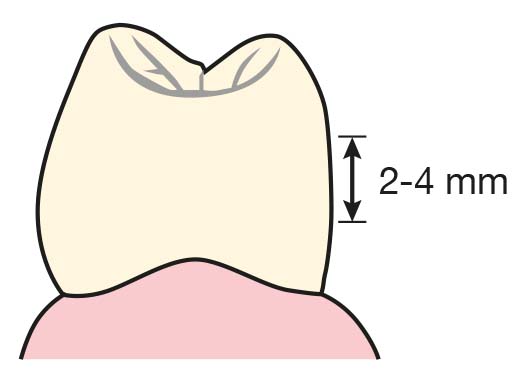
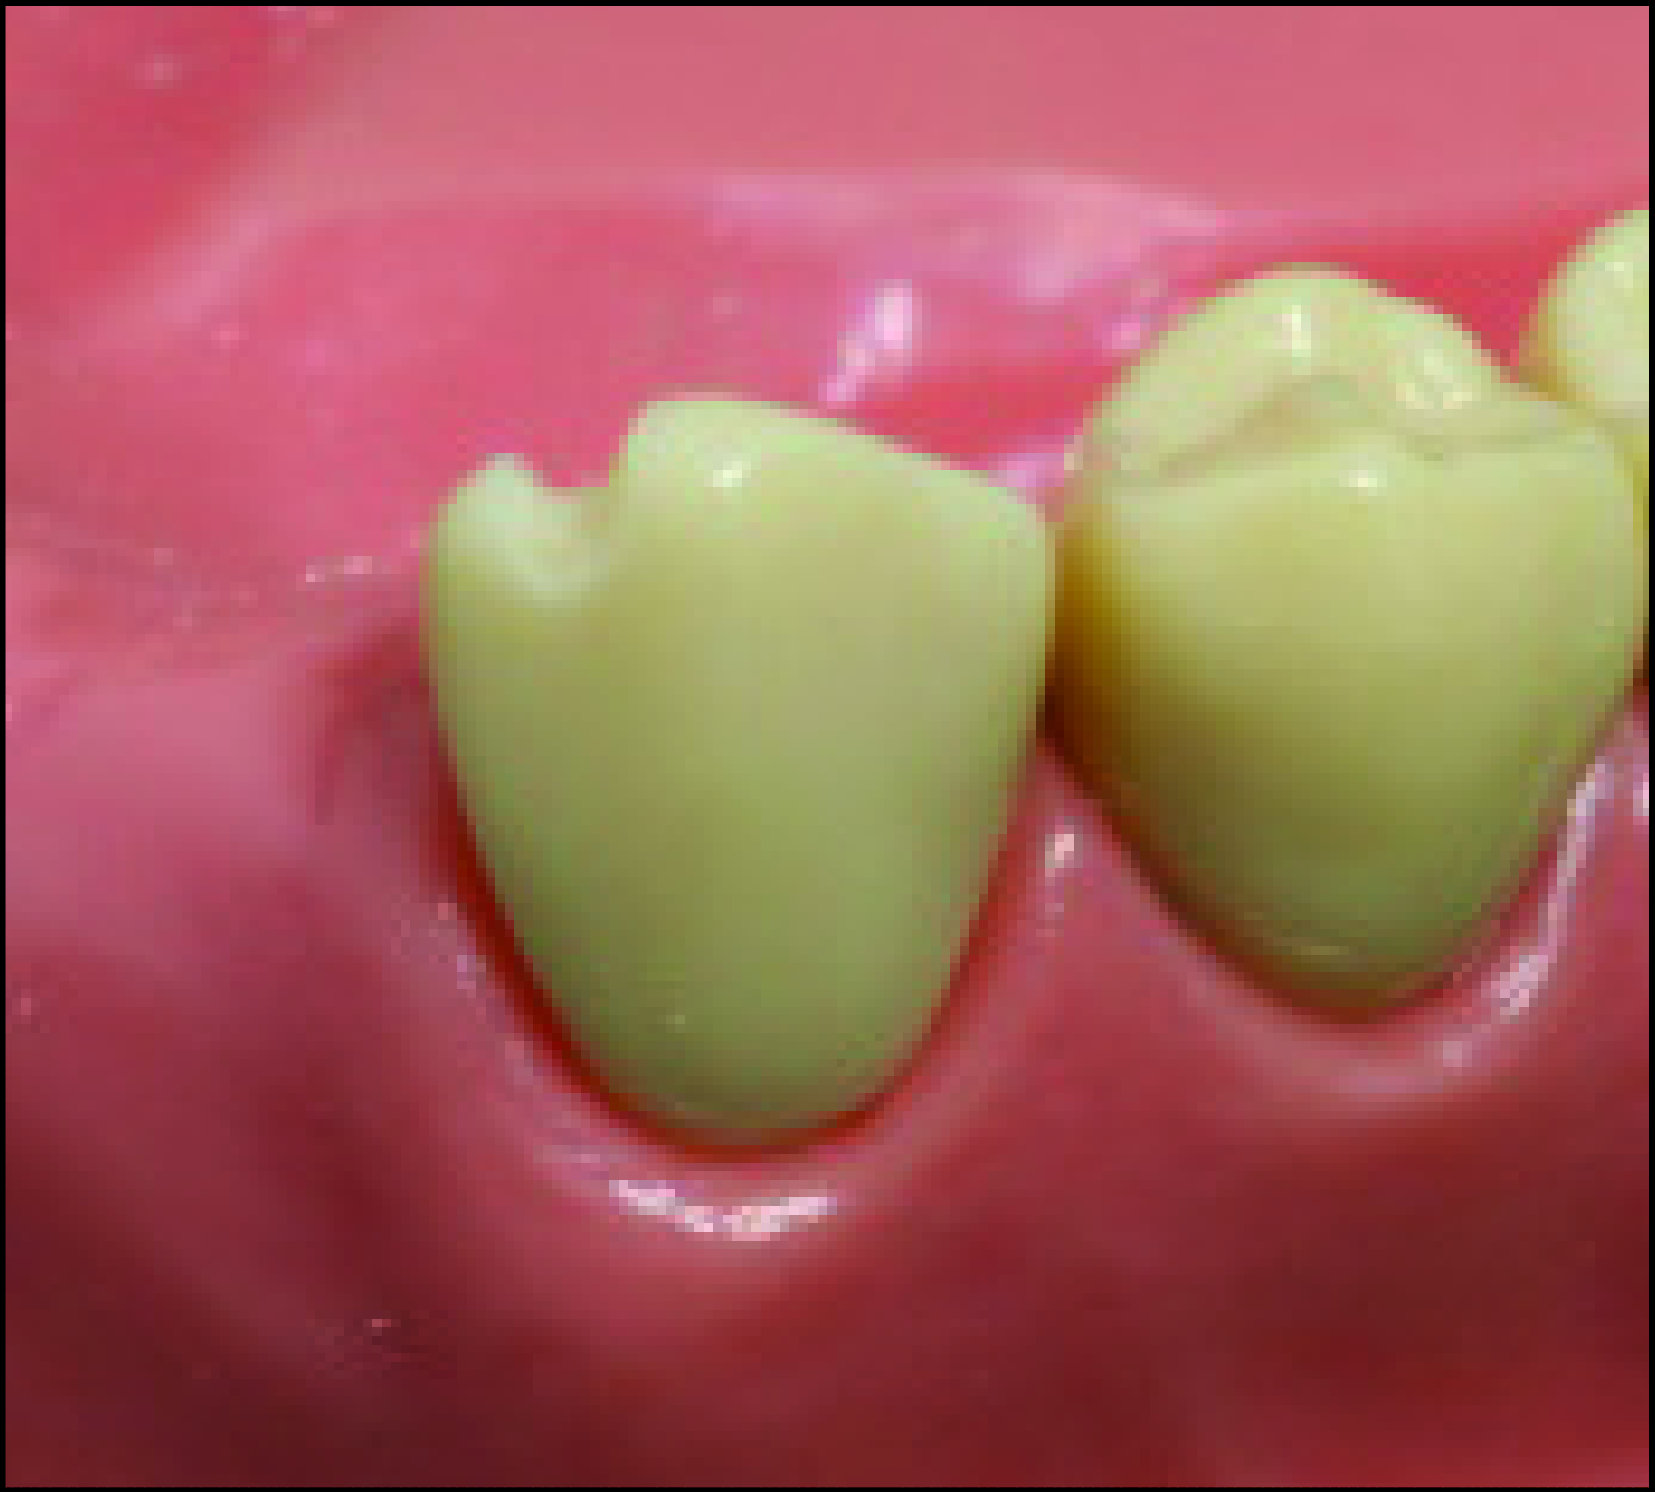
This guide plane surface should form a curvature with an occlusogingival height of 2-4 mm and not a flat surface when viewed occlusally (Figures 10-21).
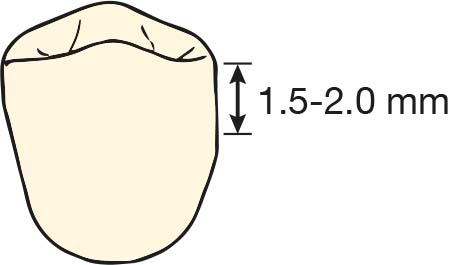
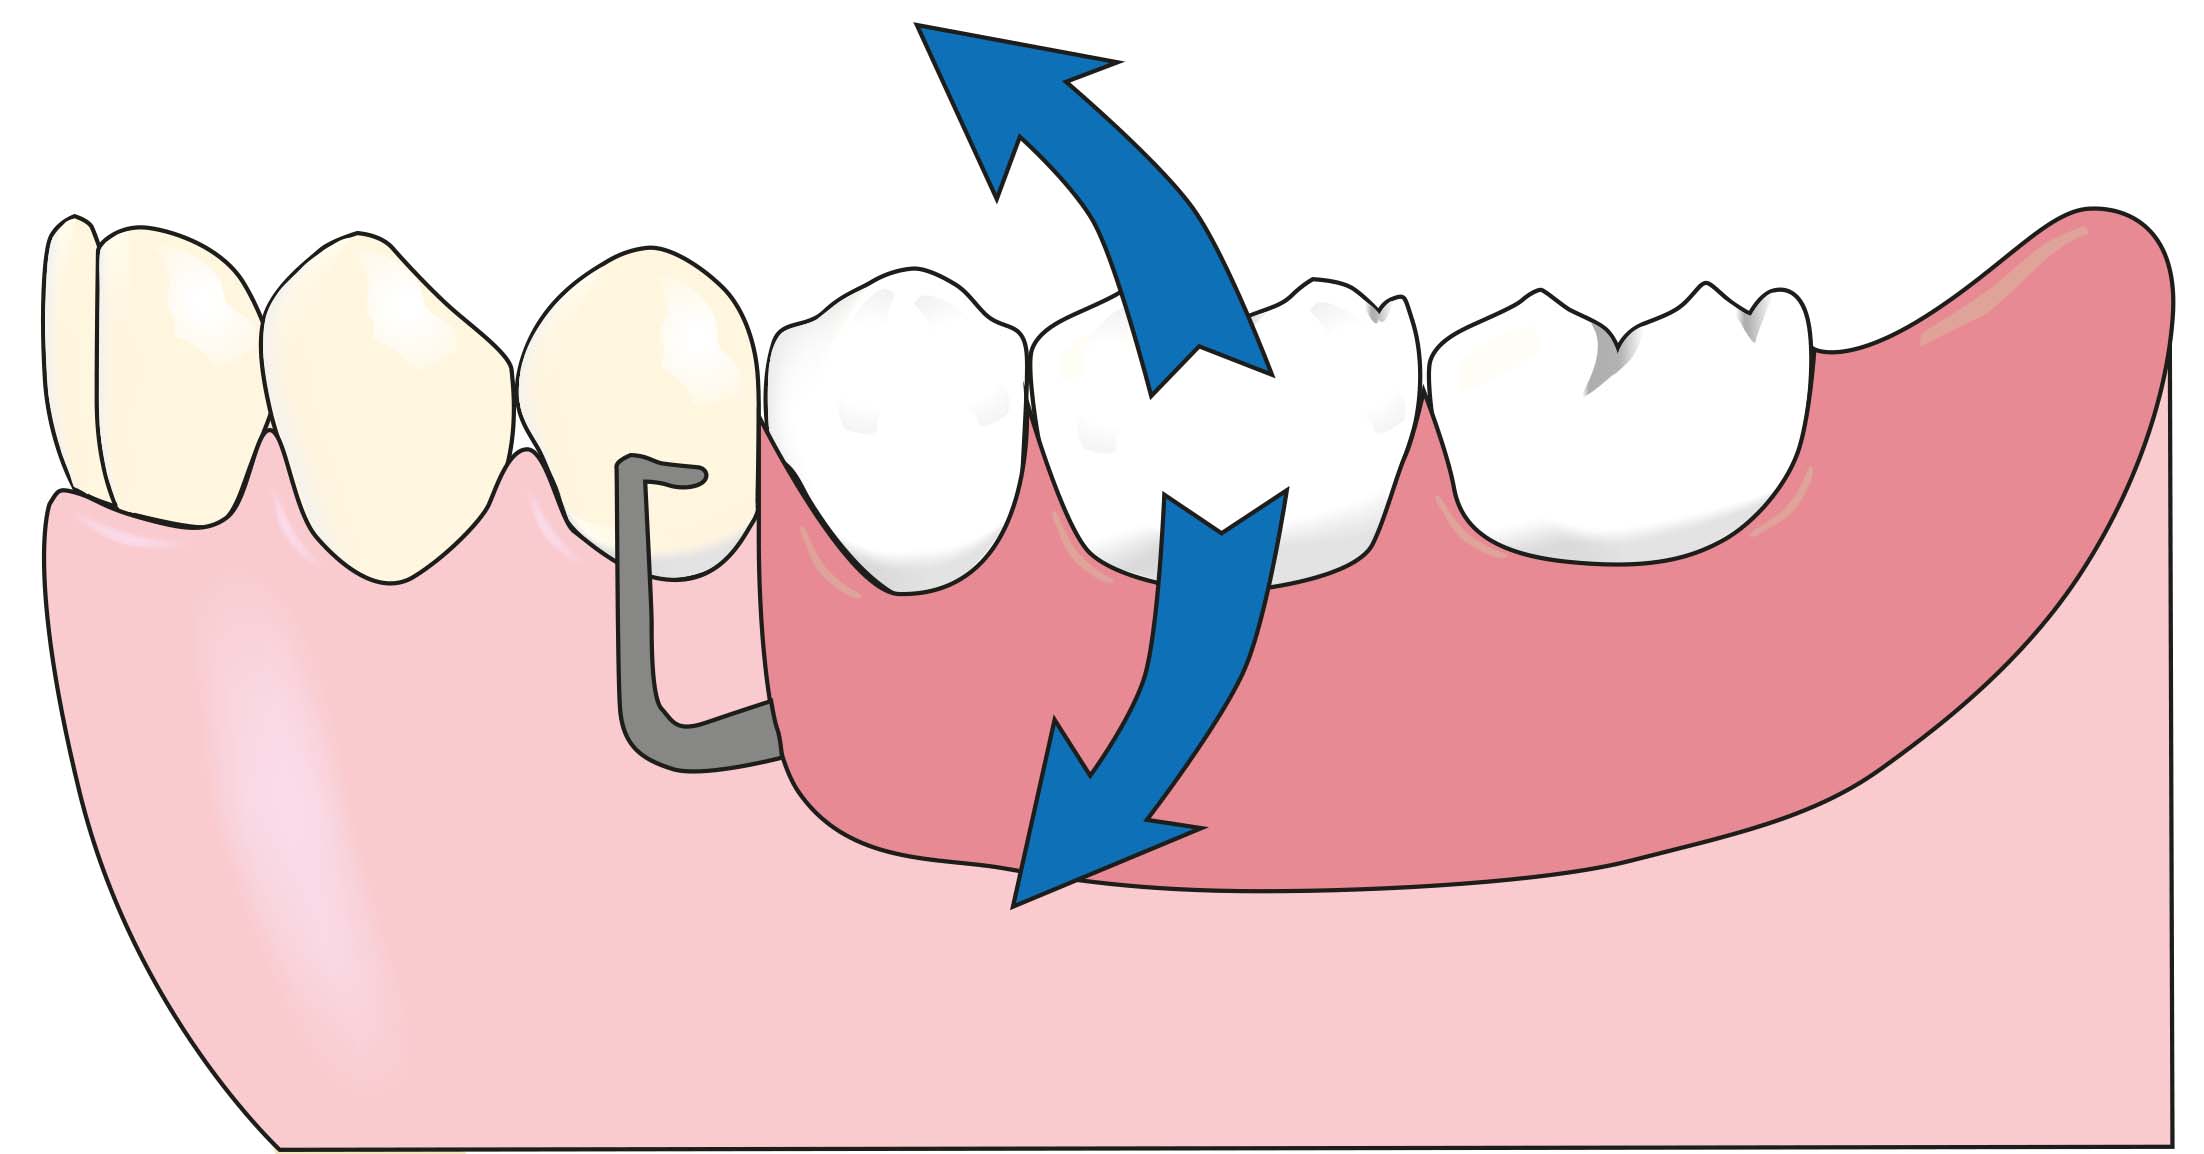
On the abutment teeth adjacent to the distal extension denture base, the guide plane height is slightly shorter, 1.5 -2 mm (Figure 10-22), reducing the proximal plate contact associated with this surface. This allows movement of the distal extension denture base and reduces the tipping movement of the abutment tooth (Figure 10-23).
On the lingual surfaces of the abutment teeth, the occlusogingival height of the guide plane is 2-4 mm. It is located in the middle third of the clinical crown when viewed from the mesial or distal aspect (Figures 10-24).
Care must be taken not to change the shape of the gingival third of the abutment tooth; otherwise, marginal gingival injuries may occur due to food accumulation.
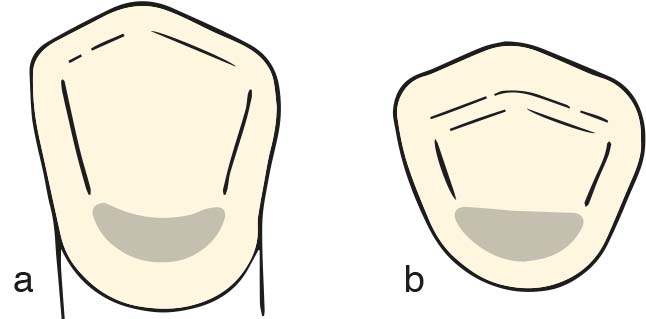
In the absence of anterior abutment teeth, the neighboring teeth may tip or shift into the space and the aesthetics of the tooth alignment may be compromised.
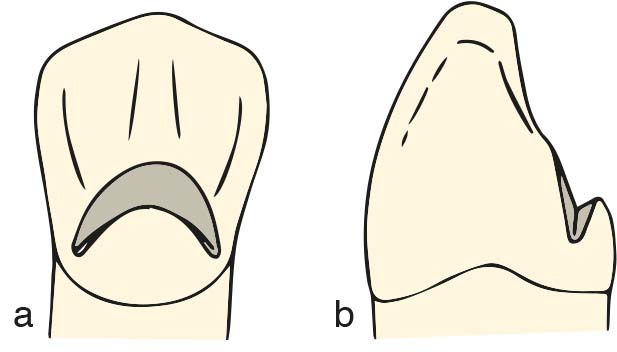
Even if the teeth are not drifted, a wide anterolateral undercut is formed in the lower part of the contour height (Fig. 10-25 a). The guide plane on this surface should also be parallel to the path of insertion (Figure 10-25 b). The tooth will be restored with a crown if the amount of preparation needed to make the modification is too great to remain inside the enamel borders.
  |
Changing the height of contour
The clasp arm is not positioned more occlusally or incisally than the junction of the gingival and middle third of the crown. This improves the aesthetics of the clasp and provides a mechanical advantage by placing the clasp near the center of rotation of the tooth. The height of the contour can be changed to place the clasp arms or lingual plate in a more favorable position.
In general, maxillary posterior teeth are tilted in the facial direction and mandibular teeth in the lingual direction, resulting in a change in the contour height of the teeth. To ensure the correct placement of the prosthetic components, the enamel surface is corrected with a beveled cylindrical bur (Figures 10-26 and 10-27).

Increasing the retentive undercuts
It is not a common procedure to change the tooth surfaces in order to increase the amount of existing undercut or to create a new undercut. For such a procedure, the tooth surfaces must be close to vertical and have an unaligned shape. In this case, the diamond rond bur is moved anteroposteriorly to create a slight indentation in the tooth surface (Figures 10-28 and 10-29).
b) Slight indentation created by preparation on the vestibular surface.
The recess should be parallel to the gingival margin and have a mesiodistal length and occlusogingival height of 3 mm. More importantly, in relation to the path of insertion, it should have a minimum anisotropic depth of 0.25 mm, depending on the planned clasp assembly. However, this indentation should not be sharp and should be made with a smooth transition; otherwise, problems will occur during the insertion and removal of the retentive clasp arm into and out of the undercut (Fig. 10-30).
Rest seat preparation
Occlusal rest seat
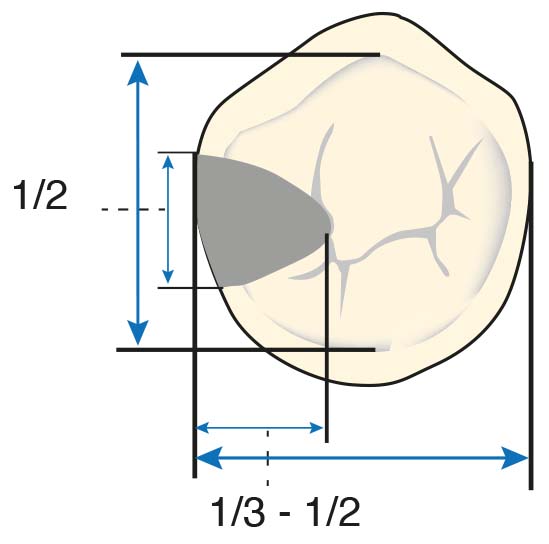
The occlusal rest seat is triangular with the base at the marginal edge and the apex at the center of the tooth. The outer edges of the rest seat and especially the apex of the triangle should be rounded. The ideal width for the occlusal rest seat is approximately half the distance between the buccal and lingual cusp tips for premolars and slightly less for molars (Figure 10-31).
The angle between the base of the rest seat and the line drawn from the tooth’s proximal surface parallel to its long axis must be smaller than 90° in order for the forces acting on the prosthesis to be transmitted vertically (Figure 10-32).
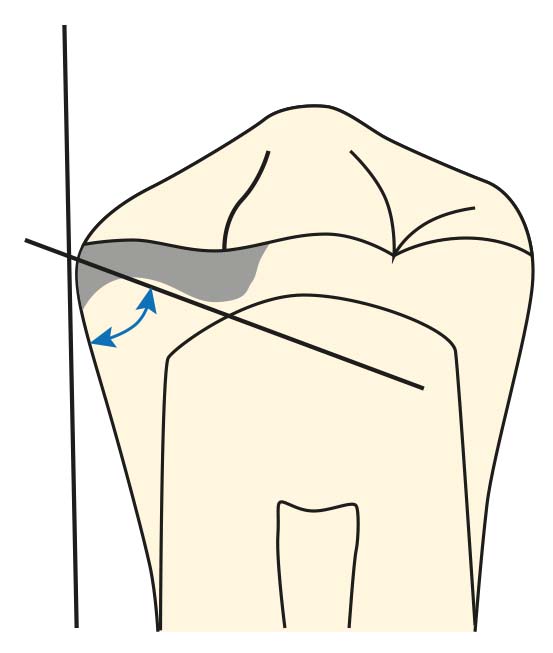
When the abutment tooth is in its normal position, the rest seat should be in the center of the residual crest; however, this is not a practical approach for rotated or tilted teeth.
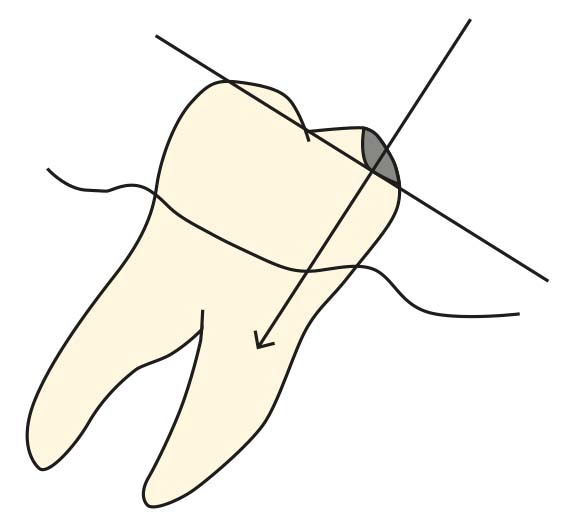
In extremely mesially inclined mandibular molars, the base of the rest seat on the mesial surface of the tooth is prepared to be perpendicular to the long axis of the tooth (Figure 10-33).
Since the occlusal rest should be at least 1 mm thick in the area where it is thinnest, the depth of the rest seat is prepared so as not to cause occlusal interference with the opposing arch. However, vertical walls should not be created by making the rest seat too deep and the rest should not be allowed to create horizontal stress on the abutment tooth. All of the surfaces of the rest seat are rounded to allow the clasp to move slightly without transmitting torque force to the tooth, without leaving short and unprotected enamel prisms that become prone to fracture. A rest seat with sharp corners does not allow the movement of the denture base, especially with a distal extension, during function.
In abraded teeth with already worn enamel and a thin layer of enamel remaining, it is preferable to restore the tooth with a crown rather than preparing the rest seat directly on the intact tooth.
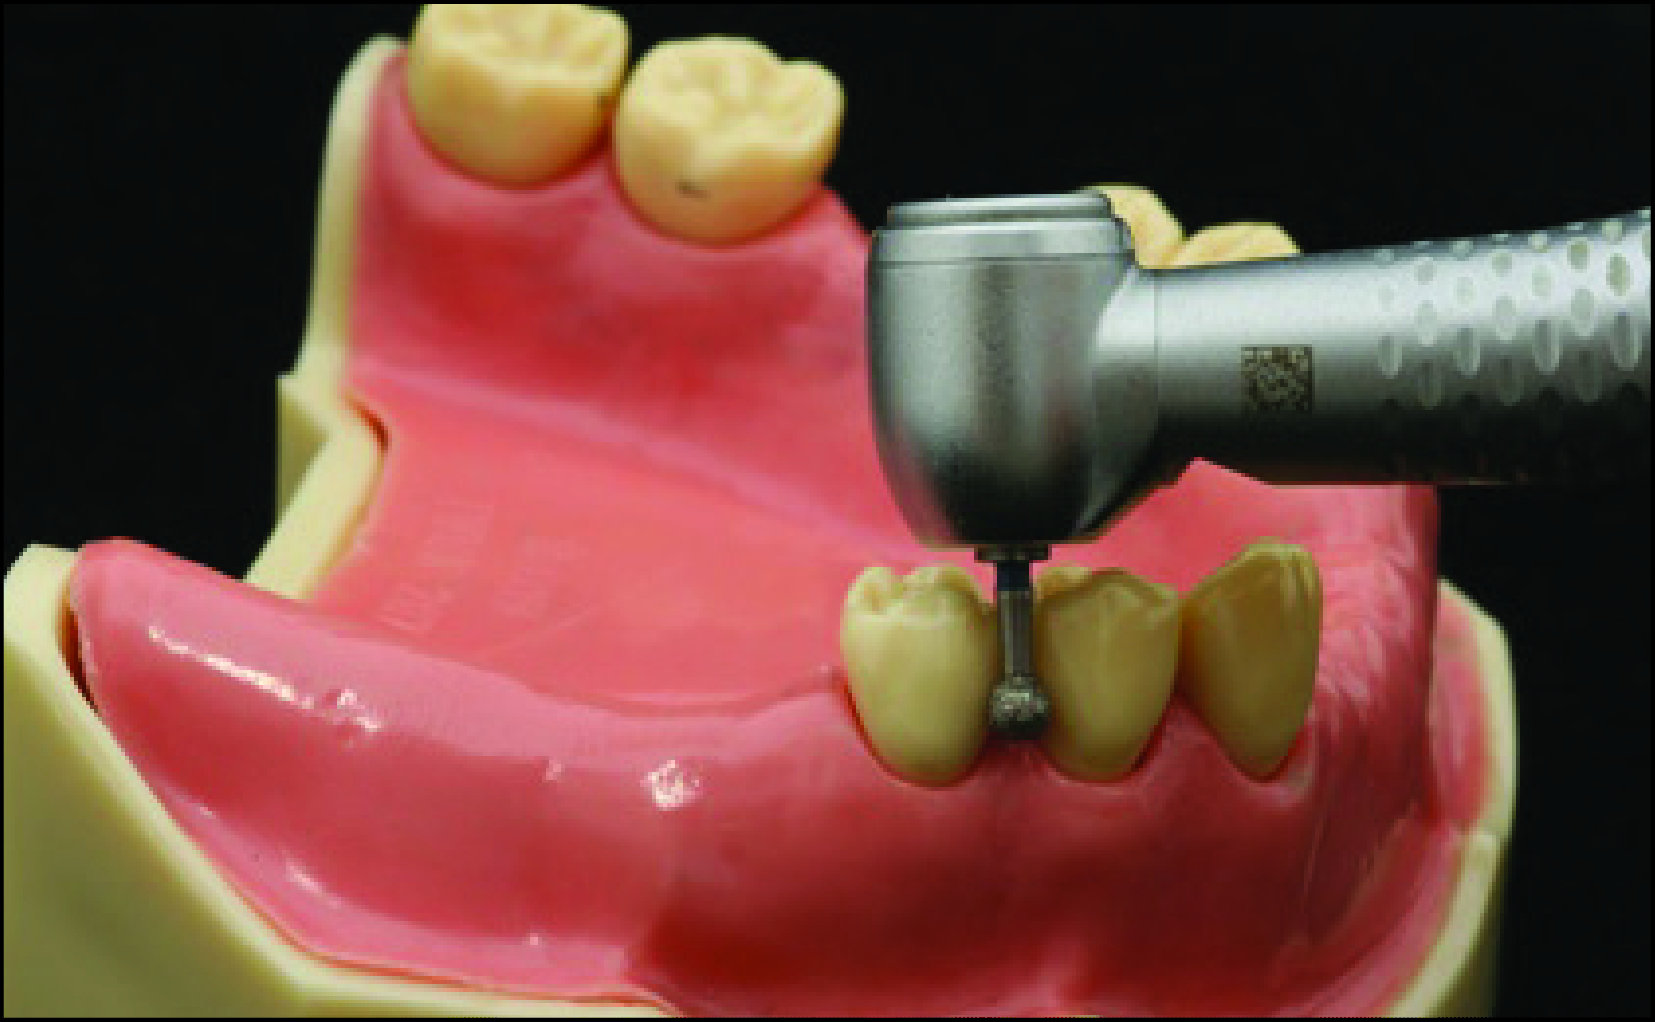
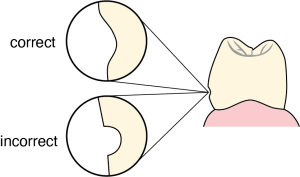
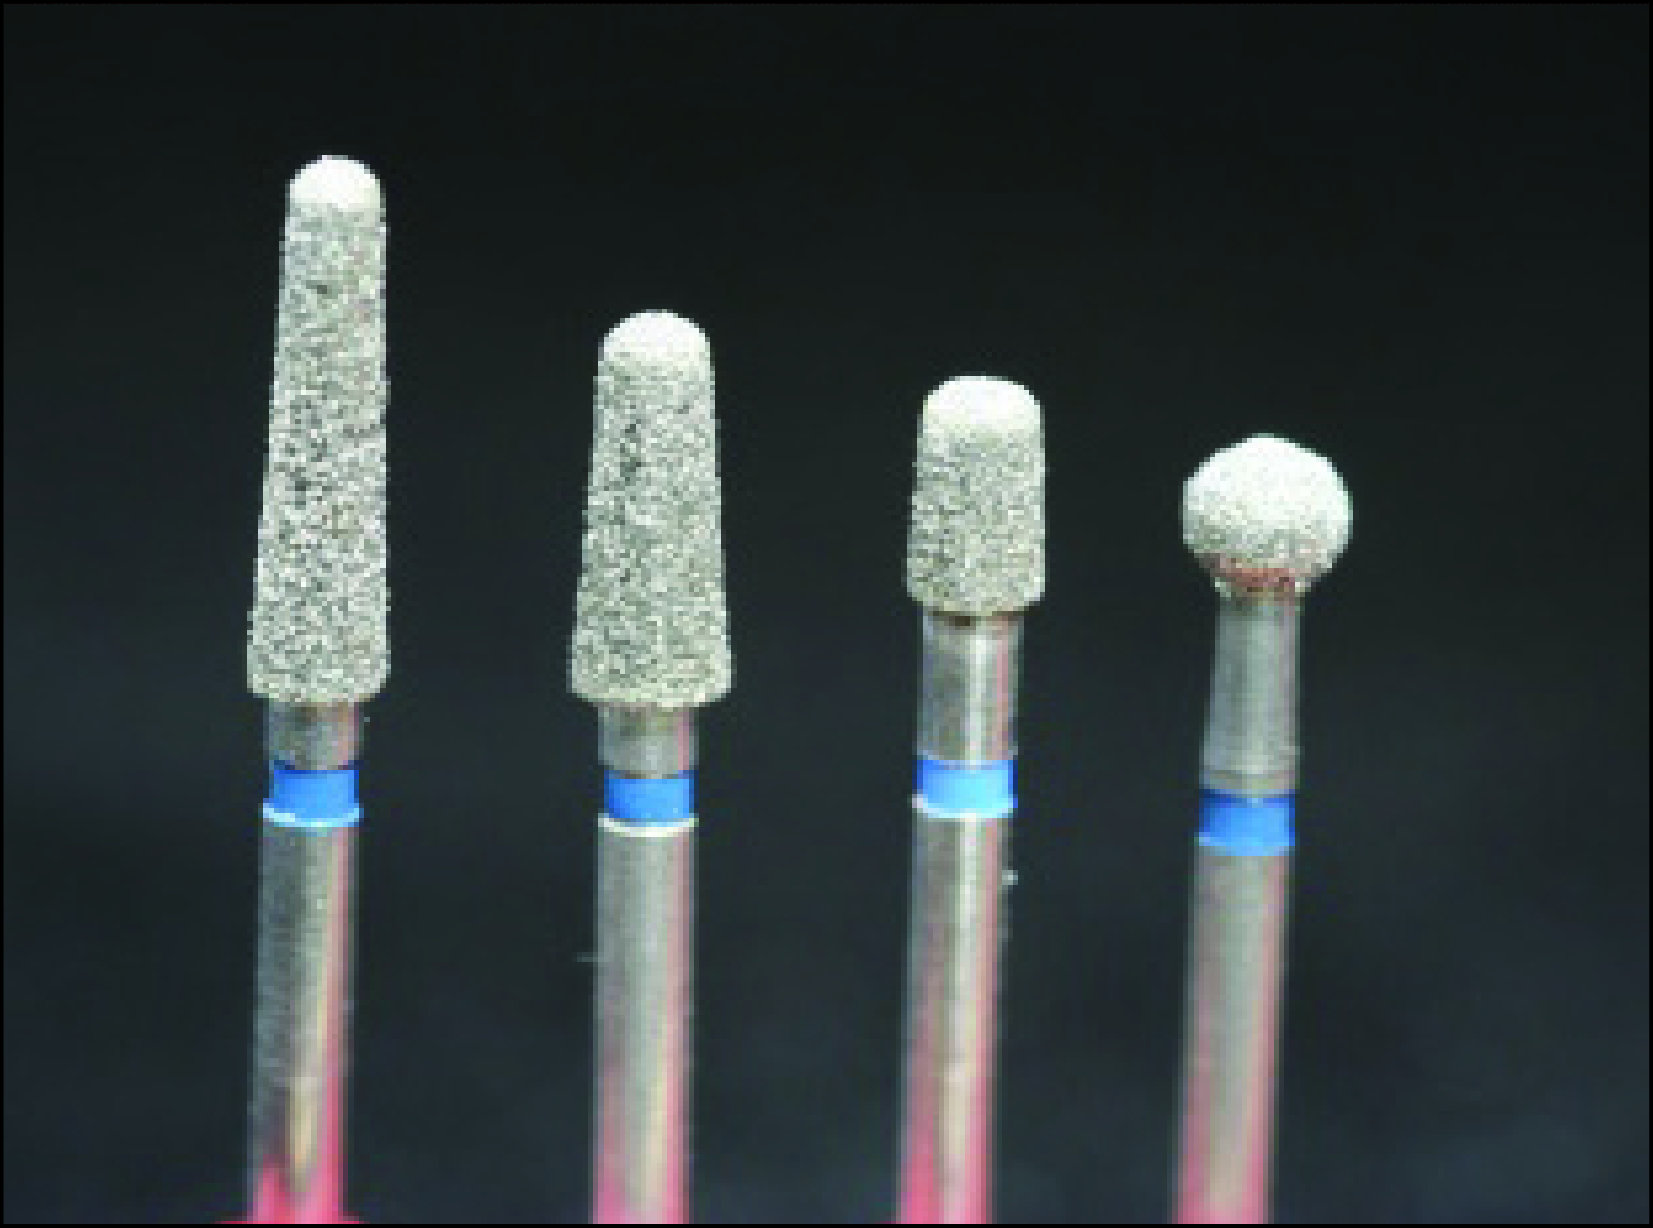
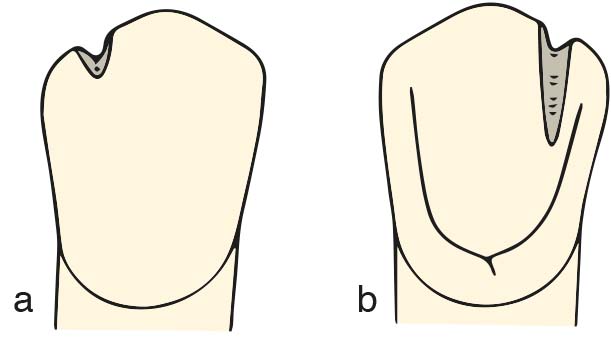
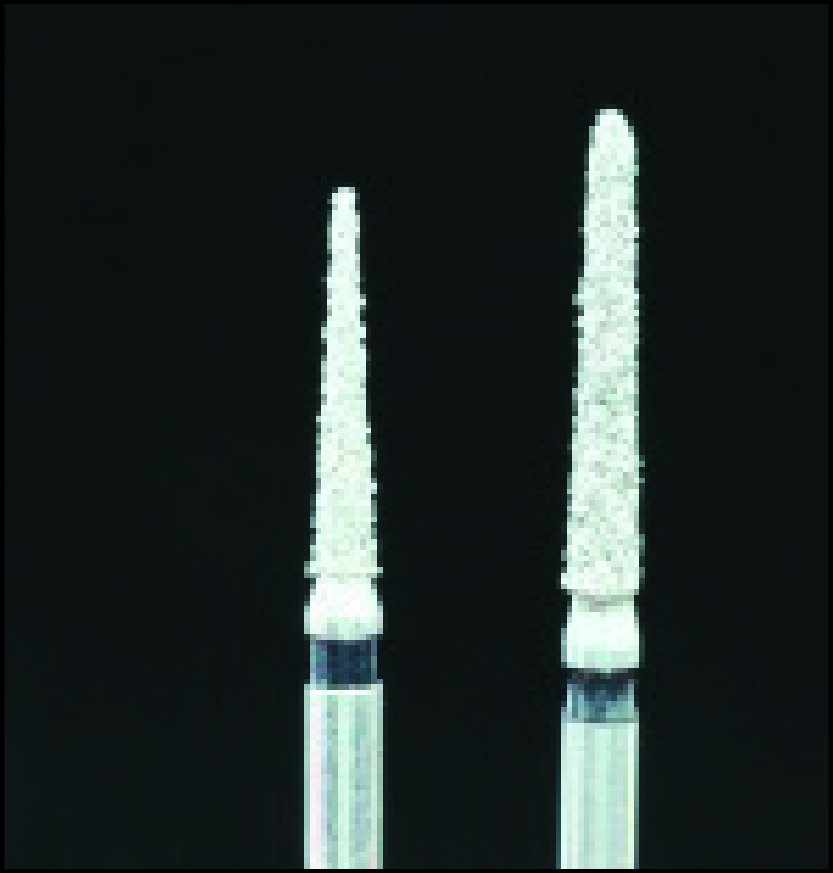
The occlusal rest seat can be prepared with rond burs, round-tipped or progressively narrower diamond burs (Fig. 10-34). When using a round diamond bur, care must be taken not to create an undercut in the rest seat (Figure 10-35). Round-tipped and progressively narrower burs allow for preparation without creating an undercut (Fig. 10-36).
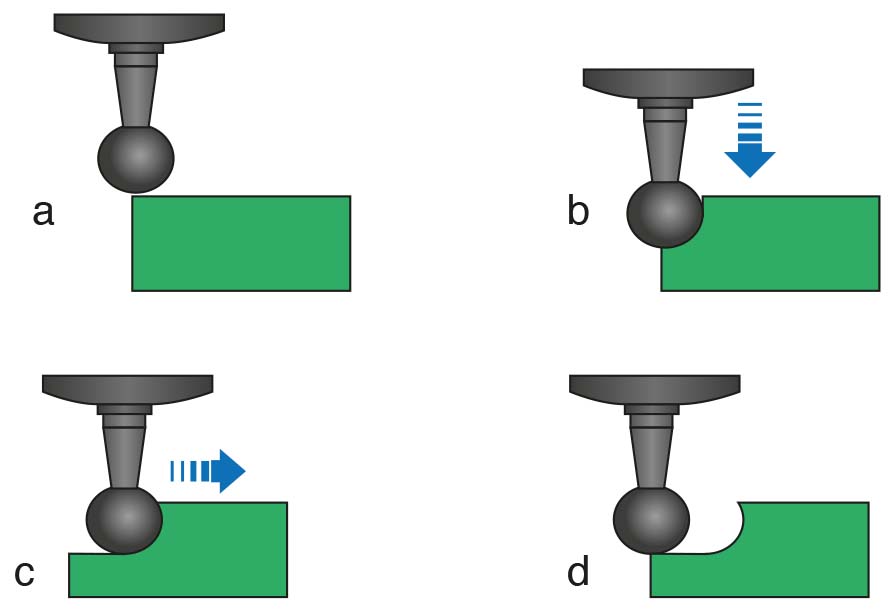
a) Round bur positioned above the enamel surface
b) Round bur advanced vertically
c) Round bur advanced horizontally
d) The undercut when the bur is removed
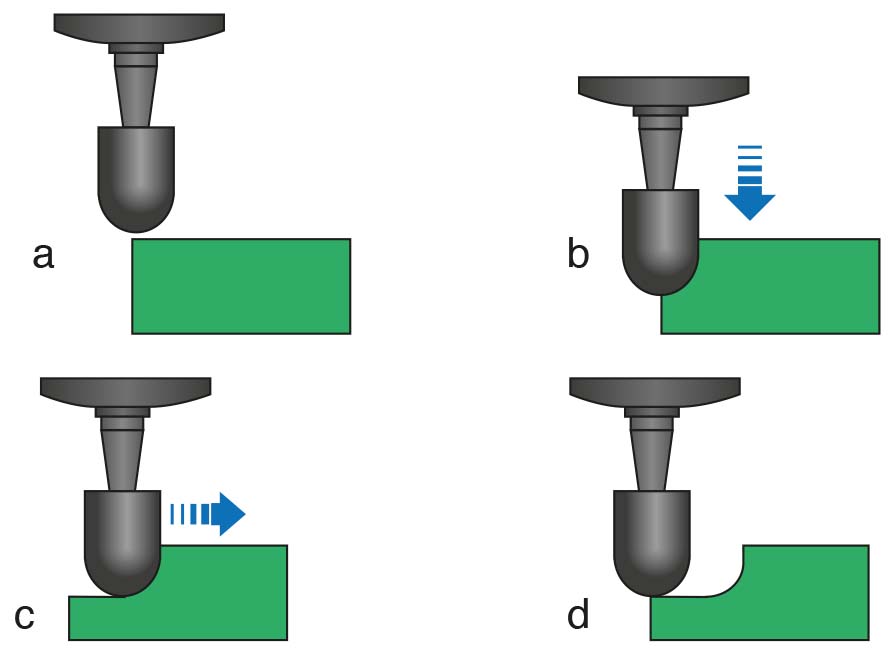
a) Tapered bur positioned above the enamel surface
b) Bur advanced in the vertical direction
c) Bur advanced in a horizontal direction
d) No undercut formation when the bur is removed
The chosen bur is used to first design the rest seat’s shape and then determine its optimal depth (Figure 10-37).
The base of the rest seat should have the appropriate slope and the preparation should exhibit sufficient depth (Figure 10-38). Once the rest seat has taken its final shape, the sharp edges and corners are rounded with a green stone and polished with rubber.
Embrasure rest seat
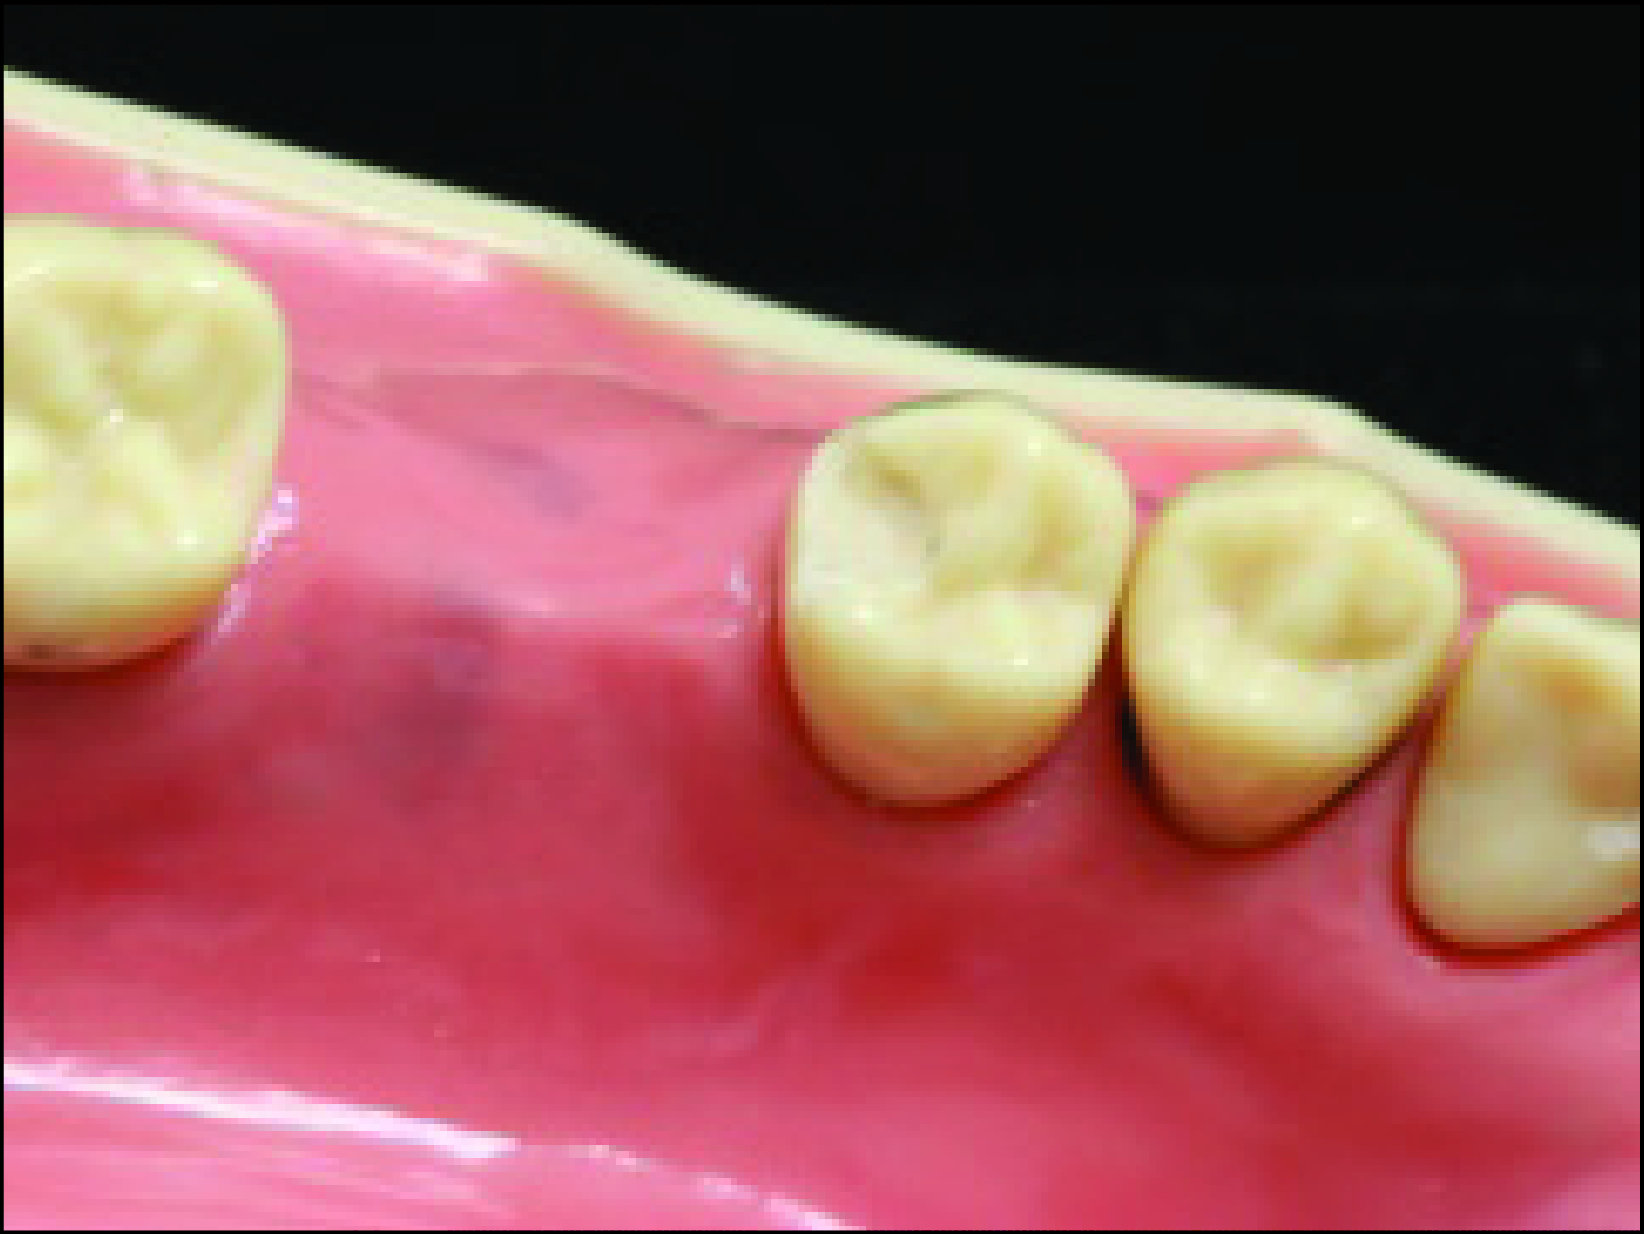
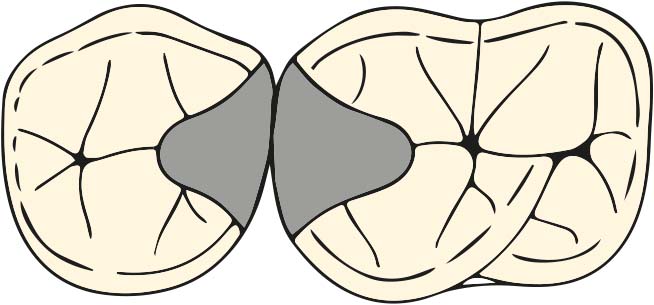
The embrasure rest seat extends from the mesial fossa of one tooth to the distal fossa of the adjacent tooth, encompassing the occlusal embrasures of two adjacent teeth (Figure 10-39). Preparing this rest seat is more challenging. To provide space for the retentive and reciprocal clasp arms, the rest seat preparations are enlarged both buccally and lingually. The embrasure clasp that will be placed on this seat will be thin and break in the vestibule and lingual marginal ridge of the teeth if these areas are not adequately prepared. It may also cause occlusal interference with the opposing arch.
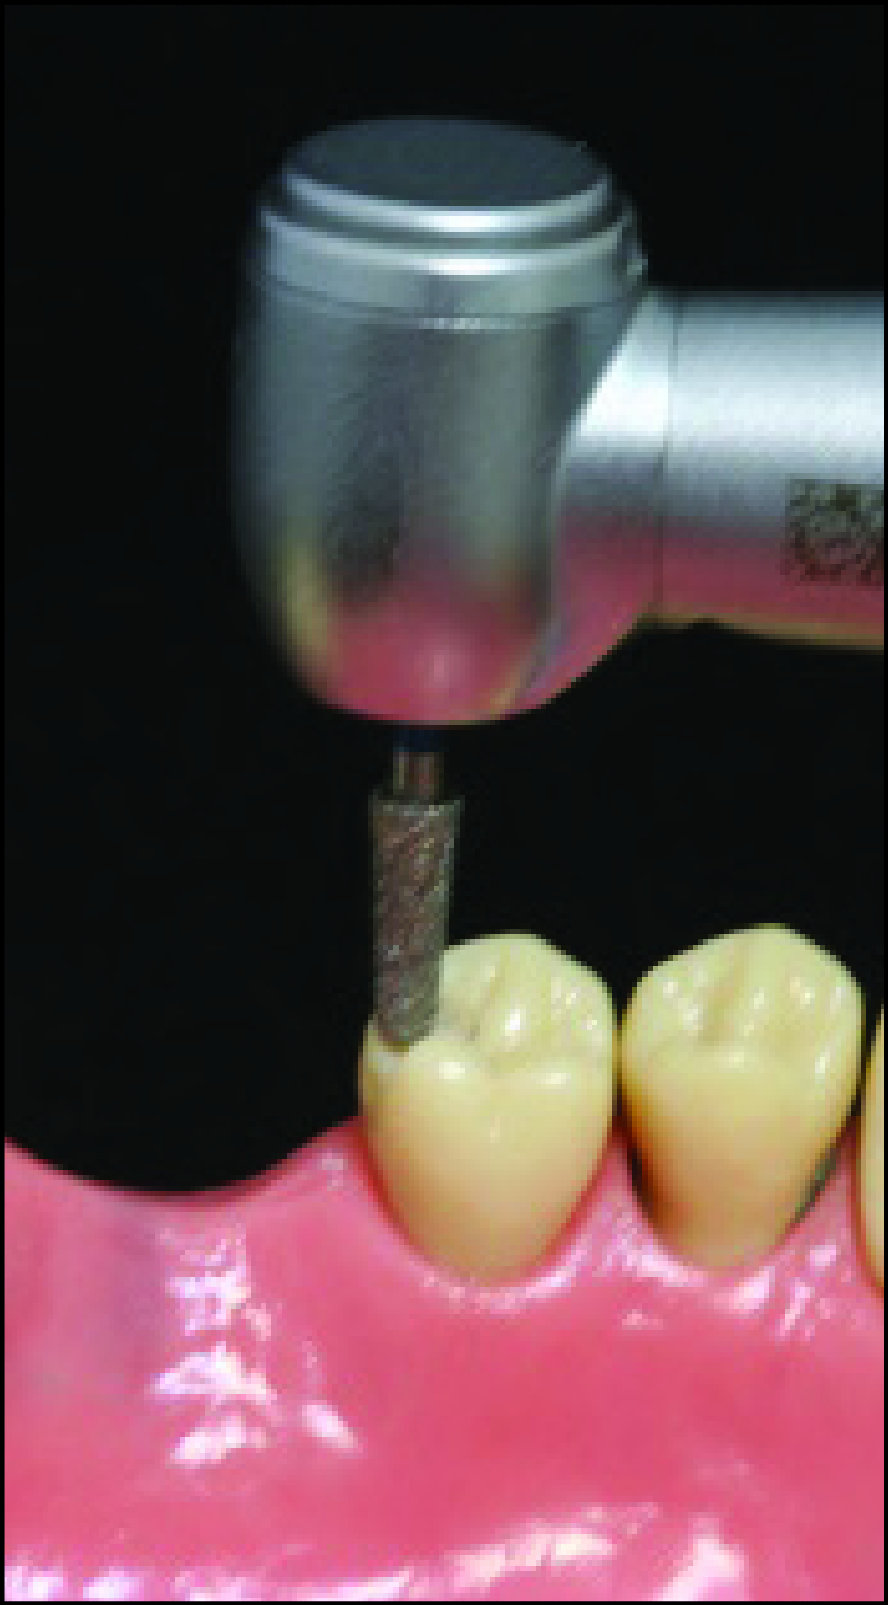
The rest seat boundaries are created with a diamond bur that is gradually narrower and has a rounded end. The same bur is then used to prepare the seat depth (Figure 10-40).
The contact areas of the teeth must not be disrupted during the procedure; otherwise, tooth migration or food impaction may occur. Using the same bur, the buccal and lingual extensions of the rest seat are prepared. In general, creating adequate space on the buccal side is more difficult than on the lingual side. Clearance can be checked by placing two clasp wires side by side. These clasp wires are positioned in the embrasure area, and if the patient can comfortably bring the teeth into occlusion, sufficient space is confirmed. The shape and depth of the rest seat can also be evaluated using pink wax. A disc-shaped piece of pink wax is placed on the prepared tooth and molded by bringing the teeth into occlusion. After examining the wax surface to verify the shape of the rest seat, the thickness of the wax in the seat area area is measured with calipers (Figure 10-41), thus determining the depth of the preparation.
The embrasure rest seat should be at least 3–3.5 mm in width and 1.5–2 mm in depth. The form of the rest seat should be rounded, and any undercuts must be eliminated. The seat is finally refined with a green stone and polished with rubber.
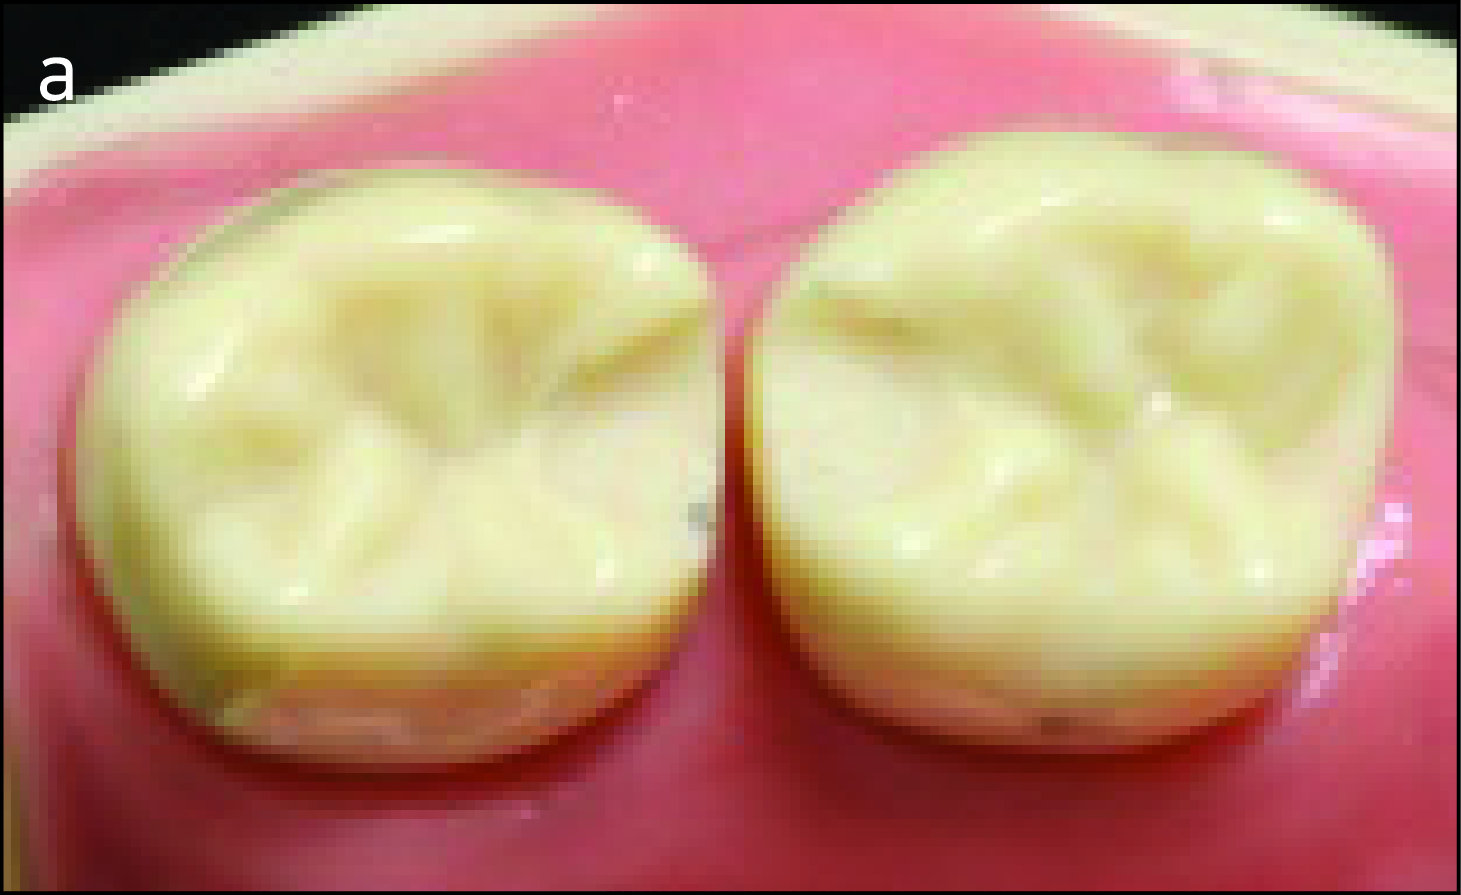 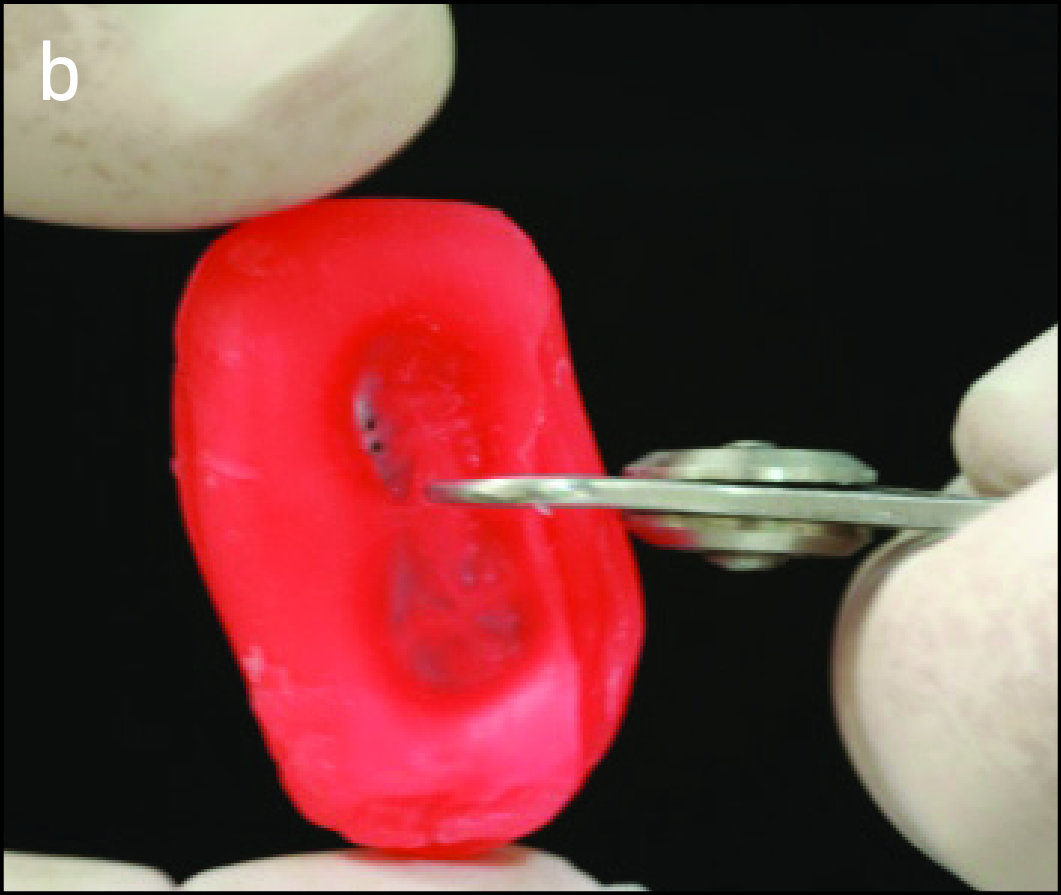 |
a) Adequate preparation must be performed on both the buccal and lingual surfaces.
b) The depth can be evaluated using a disc-shaped piece of pink wax, which is shaped by bringing the teeth into occlusion.
Cingulum (lingual) rest seat
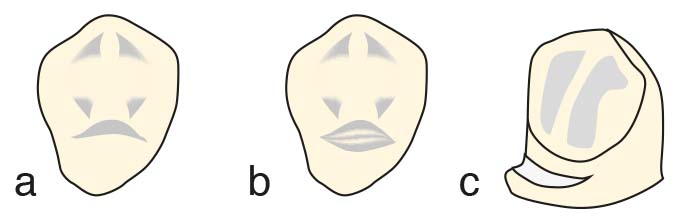
The cingulum rest seats may be prepared in various designs such as “V”, “U or C”, and “flat ledge” types (Figure 10-42).
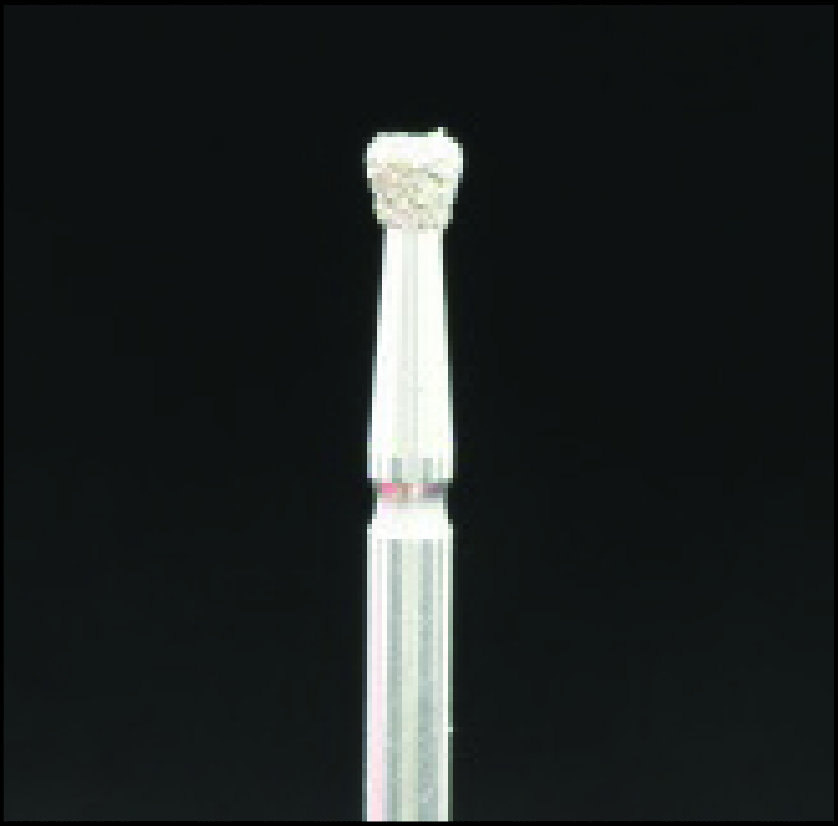
The rest seat should be located more apically than the contact point with the opposing tooth. Otherwise, insufficient space will be available for the metal framework of the prosthesis. An inverted cone bur with lateral cutting edges is used for the preparation (Figure 10-43).
Undercuts should be avoided on the walls of the rest seat. The preparation area is finished with a green stone, and polishing is completed using rubber instruments. The final form of the rest seat should be slightly rounded with a smooth surface.
The “V” rest seat appears crescent-shaped when viewed from the lingual side, extending from one marginal ridge to the other, and is V-shaped when viewed from the proximal surface (Figure 10-44).
The diamond bur is held at a slight angle to the lingual surface, starting from one marginal ridge on the lingual side and progressing to the other marginal ridge; thus, a crescent shape is formed in the rest seat (Figure 10-45).
 |
 |
 |
a) Preparation started with an inverted cone bur begins at one marginal ridge, passes over the cingulum, and ends at the other marginal ridge,
b) View from the proximal surface,
c)View from the lingual surface.
The “U” or “C” rest seat is an alternative design to the conventional V-shaped rest seat, suitable for teeth with a prominent cingulum, and features a rest seat shaped like an inverted U or C (Figure 10-46). Preparation starts from one marginal ridge on the lingual surface and proceeds apically toward the cingulum level. As it advances toward the other marginal ridge, the bur rises in the incisal direction. While sufficient depth is achieved, this rest seat design is rarely preferred on enamel because dentin may be exposed.
a) view from the lingual surface, b) view from the incisal surface.
“Flat ledge” rest seat is especially recommended for crowns on canines. When applied to natural tooth structure, this is the least effective design.
Incisal rest seat
The incisal rest seat, prepared only on lower anterior teeth, is generally placed near the proximal surface (Figure 10-47). Due to esthetic concerns, placement on the mesial side is not preferred. Incisal rest seat preparation is started with a flame-shaped diamond bur (Figure 10-48). The bur is used parallel to the path of insertion of the prosthesis (Figure 10-49). The rest seat should be located 2–3 mm away from the proximal corner and have a depth of 1.5–2 mm (Figure 10-50).
While the prosthesis is under masticatory load, the rest seat is slightly extended toward the buccal surface of the abutment tooth in a notch-like manner to prevent buccal movement of the tooth. On the lingual surface, a small groove is prepared to accommodate the thickness of the minor connector. Polishing of the rest seat is performed using green stone and rubber points. The final preparation should have smooth surfaces and should not cause discomfort to the patient (Figure 10-51).
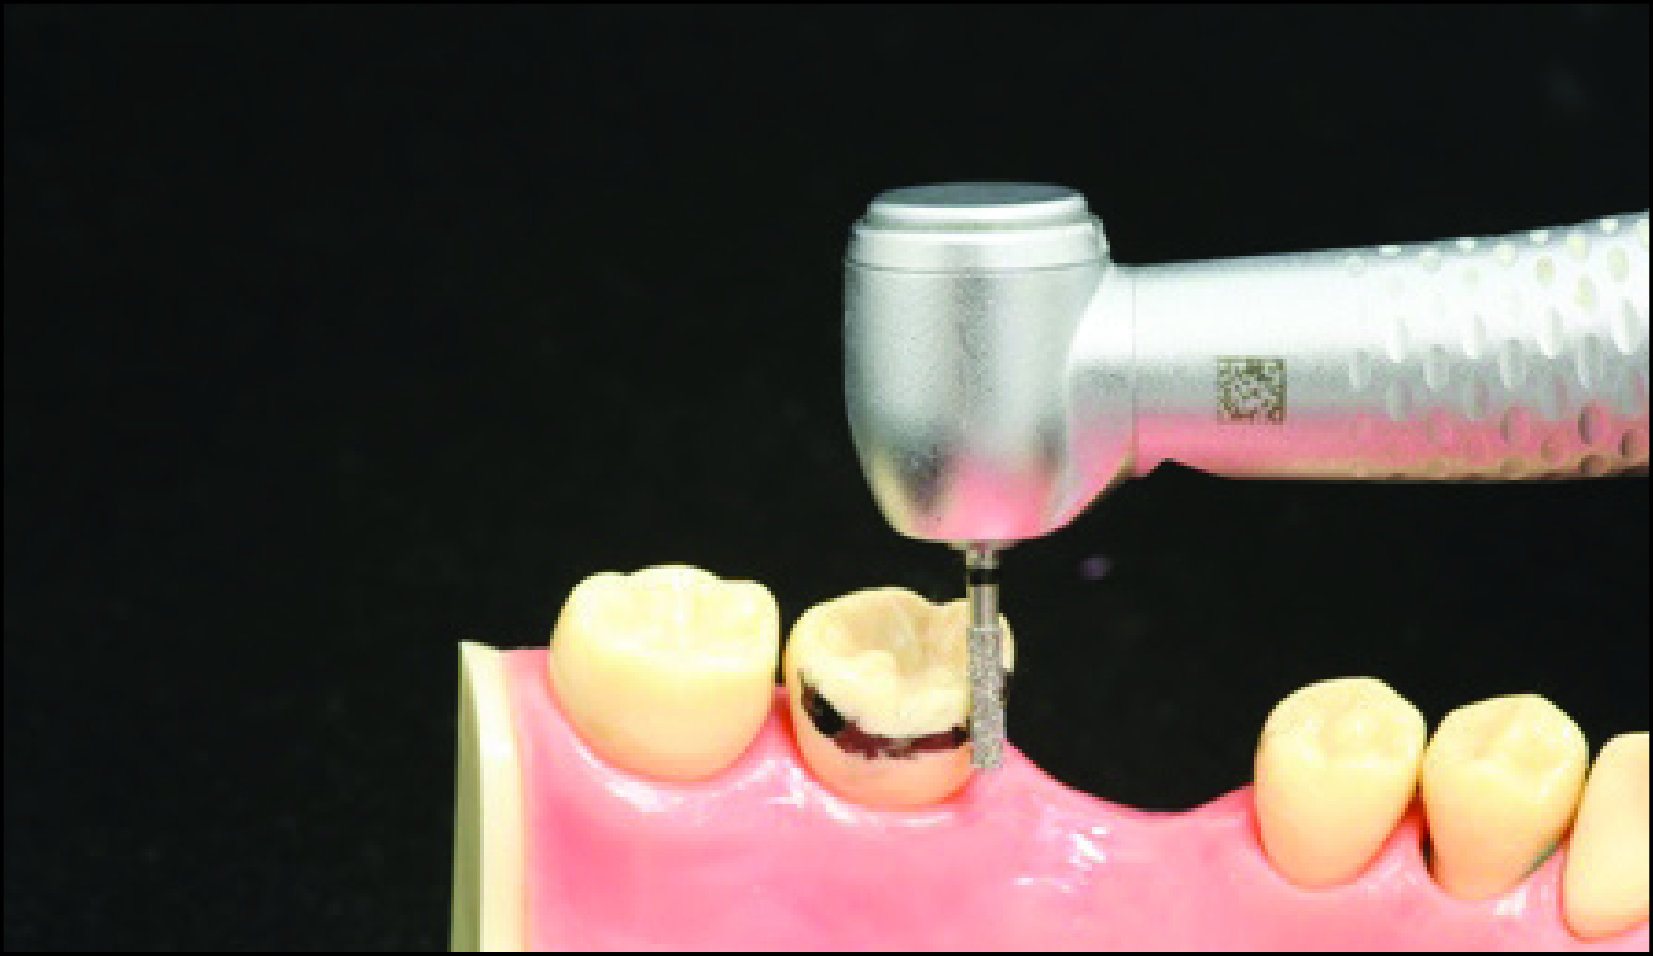
Rest seat for amalgam restoration
Preparing a rest seat on a multi-surface amalgam restoration is less preferable compared to preparations on enamel or crown restorations. Amalgam alloy tends to deform under loading and may fracture, leading to failure of the restoration.
When considering the preparation of a rest seat on an amalgam restoration, factors such as the amount and location of the remaining tooth structure, the depth and extent of the amalgam restoration, the fracture resistance of the amalgam, and the size and location of the planned rest seat should be evaluated. If there is uncertainty regarding these factors in an existing amalgam filling, the restoration should be replaced and made suitable for the rest seat preparation.
Rest seats prepared on large amalgam restorations generally result in failure. Therefore, better results are obtained when the rest seat is prepared on restorations with smaller volume and partially shaped on enamel surface. It is important to avoid preparing the entire rest seat on amalgam restoration. The procedure should be similar to the one performed on enamel.